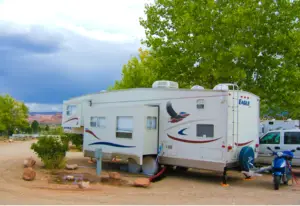
If you own an RV, you understand the importance of taking care of it so that it can serve you the longest time possible. And the best way to go is to protect and maintain it. How?
RVs are prone to problems, which if gone unnoticed, you will end up with costly repair damage. One of the most common problems with RV is roof leakages.
In this article, we will discuss;
Common causes of RV roof leakages
RV roof repair tips
How to maintain RV roofs
Let’s get started.
Common causes of RV roof leakages
Water damages can decrease the value of your RV more than you can repair it. So, it is crucial to inspect your roof now and then.
Here are five common causes of RV roof leakages;
Tree Branches
Even if it is a low-hanging tree branch, don’t ignore this occurrence because the damage is quite devastating. Tree branches can rapidly puncture the membranes of your roof. So, get up there and remove it.
Cleaners with petroleum solvents
While cleaning is a better way of making your RV last for a long time, be aware of the cleaners that you use. Don’t use cleaners that contain petroleum, especially on your vinyl or rubber roofs. It will damage the roof surface permanently.
Broken Shingles
Shingles are the outside layers of a roof. You can easily notice shingles by taking a look at different colored patches on your RV roof. Sometimes, you can find them littering your RV after a heavy wind or storm.
Poorly sealed valleys
Valley is where two planes of a roof join. Because valleys are sloped, and if they are not sealed properly, it becomes easier for rainwaters to get inside as they run down the roof.
Ice build-up
Sometimes ice can build up on your RV roof, preventing water from draining off. The weight of this ice itself can damage the surface of your RV roof, causing tears and rips.
How to fix RV roof problems
Fixing an RV leaky roof is now going to be easier than ever before. Here are three steps to follow;
- Know the source of the leak
- Apply temporary fix
- Make a permanent fix
Bear in mind that each type of leak is different and requires different materials to fix it.
That said, what do you need to do in case you find out that your RV roof is leaking? A first step is a preventive action, of course. In this case, identify the leak to prevent the problem from getting worse.
So, how to inspect the leak?
One of the best ways of identifying leaks is to do a regular inspection. It can be done either from the interior or from the exterior of your RV.
Prior inspection for roof leaks can help you prevent problems from becoming anonymous. It is recommended that you should inspect your RV after one year. However, if you are using your RV outside regularly, it is wise to inspect the roof at least twice a year.
It is also a good idea to check your RV roof during weekends if you are going for a vacation.
Interior Inspection
It is the easiest place to start your inspection. Simply take a look at your RV’s roof from the inside and identify possible damages. If you find any water stains, that means you have a roof leak somewhere.
But not all roof leakages appear on the ceiling. So, you need to check on the walls because some leaks can run to the side of your RV.
Exterior inspection
The exterior inspection ideally is identifying any damages on the roofs. But you can concede the fact that not all roofs will allow you to step on them.
Some RVs provide a ladder leading users up to the roof, while others don’t. For those that don’t have, check the manufacturer’s manual to see how much weight they support.
Ensure you do a thorough inspection, especially of parts around the vents. Also, check any visual cracking, soft spots, and depressions that may appear on your roof.
Apply temporary fixes
Temporary fixes will only save the situation for a short period. Patches are the best-known temporary fixes that you need to have in your RV. But the guide below will also help to prevent your problem from getting worse.
TARPING
It is one of the easiest ways of applying a temporary fix to your roof. You are only required to put a trap on your RV roof and set rope to hold them down. Ensure you pull them tightly. Otherwise, they will be pulled away by a heavy storm or wind.
Caution: Never run your HVAC system if your RV is tarped. It can cause co2 build-up or fire break-out.
TAR PAPER
There are some serious cases where you might need glue tar paper on your RV roof. Tar paper is cheap and offers excellent protection for your roof.
DRYING OUT
After the above steps, dry out the interior thoroughly. You can use an electric heater or a heavy-duty fan to speed up the process.
Drying helps to prevent molds and other bacterias from building up inside your RV.
RV roof repair tips
Scratches, holes, and cracks are common issues that you are likely to experience at one point or another. Thankfully, these repairs do not require an expert.
DIY RV repairs
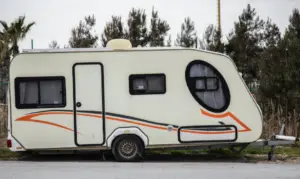
Before you proceed to anything else, ensure you know the material your RV is made. Below is a list of different types of roofs you can have on your RV.
- Fiberglass
- Rubber
- Aluminum
- Wood
- Proper Cleaning
It is the initial stage that applies across all materials. It is always recommended to clean the repair area to remove any debris or mold build-up that prevents repair materials from sticking to the surface well.
Like said earlier, do not use petroleum-based cleaners or citrus-based cleaners because they can weaken the roof with time. Remember, each roofing material is constructed differently and has different cleaners.
Also, if you are working on a large repair area, it is advisable to cover the rest of your roof with plastic to prevent roofing cleaners from dripping off the sides.
Now, let’s discuss how to repair;
- Fiberglass RV roofs
- Rubber RV roofs
- Metal RV roofs
- Wooden RV roofs
How to repair fiberglass roof
There are two main processes involved; resealing the roofs and patching the holes.
Resealing fiberglass roofs
Just like rubber, fiberglass’ top coating oxidizes over time which may make roofs appear chalky. So, before you decide on cleaning these roofs, ensure to scratch any pieces of curled coating off. Then you can fine-rub the surface to medium grit using sandpaper. Once the surface becomes clean, apply the sealant to the roof using a roller or paintbrush.
IMPORTANT NOTE: Make sure you apply a liquid sealant specifically designed for fiberglass.
PATCHING A HOLE
If it is urgent, you can quickly fix a hole using a fiberglass repair patch. However, if you are after something permanent and long-lasting, a little bit of work is required.
First, you need to patch the damaged part until the frayed material becomes smooth. It is advisable to wear a safety mask, gloves, and goggles because fiberglass can affect your skin, eye, and lungs.
Once the part is clean, apply fiberglass patches, layer by layer, as indicated on the repair kit instructions guide. Complete the work by adding a sealant.
How to repair rubber RV roofs
Rubber roofs tend to last longer than other materials, as long you understand how to take care of them properly.
APPLYING SEALANT
The most commonly used coatings for rubber are EPDM and TPO. If your rubber roof looks chalky, it is likely because of the fresh coat of a sealant. And with time, the coating may end up breaking down, causing your RV susceptible to leakages.
Applying a liquid sealant isn’t busywork. But before you decide on purchasing a coating sealant, ensure you have the exact measurement to have the right amount. Clean the damaged area, let it dry and apply the sealant using a roller.
RESEALING JOINTS
Most RV owners experience problems around the edges more than the roof surface. For this reason, joint resealing is necessary.
Resealing joints is straightforward. Just follow the instruction indicated on the bottle, and apply the seal around the edges. Whether there are damages or not, resealing joints is a better way of preventing future leaks.
PATCHING A HOLE
If you find small tears on your RV, clean the damaged part and fix it with a patch. Thankfully, today’s manufacturers offer patches that are easier to fix and durable as well. Use rollers when working out the air bubbles.
REPLACING RV RUBBER ROOFS
When rubber roofs are beyond repair, a complete replacement might be the best choice. While this is a job for professionals, you can choose to do it on your own. But you first need to seek advice from experts to provide you with specific guidance.
Here are five steps to follow;
- Remove all the rooftop materials such as vents, A/C, among others
- Take off the rubber membrane from the roof
- Replace the new membrane
- Reinstall the rooftop materials
- Apply sealant and reseal all joints
- How to repair metal RV roof
Here is how to repair and seal the damaged parts of your metal roof.
RESEALING METAL RV ROOF
Dicor is the most common product used in sealing metal roofs because of its rust resistance. Unlike rubber and fiberglass repair, you need to seal the joints using a caulking gun.
PATCHING PUNCTURES OR TEARS
Patching holes on your metal roof is done with a Stick patch. However, this depends on the size of the damaged part.
Patching holes isn’t a difficult job. Just clean the damaged part and stick it over with the patch. Remove the air bubbles using a small roller for a smooth finish.
If your metal roof is extremely damaged, you may consider a replacement. However, the process varies depending on your RV material.
How to repair wooden roofs
Have you ever imagined wooden roofs? Well, wooden roofs are rarely found on historic RVs.
Wood does not make a perfect roofing material because it can leak apart any nails that have been used to construct it.
If you are having a wooden roof on your RV, you can consider replacing it with other modern types of roofing materials.
Anyway, seal the parts around the nails and protect the corners with trims. For a wood roof that has started showing rotting signs, consider a replacement.
Read the manufacturer’s instructions.
It is a good idea if you read the manufacturer’s instructions for any repair material you purchase. Some require specific cleaners, others special primers. Also, not all instructions guidelines are the same. So, follow what your manufacturer has written.
Apart from instruction, make sure to do your repair during optimal weather conditions. Yes, because some sealants require 24-48 hours before they are subjected to rain.
When do you need an expert for an RV roof repair?
Most RV roof repairs are DYI. However, if you have no idea or ability to repair a particular issue, you might want to hire a professional. They provide you with more guidance about dealing with the problem and the additional supplies that may be needed.
Involving a professional during your RV’s roof repair is also an assurance of quality services. A professional roof repair company will also guide you on the cheapest way to have the repairs done.
WRAPPING UP
There are plenty of reasons why your RV roof can leak. We also understand that different causes have specific solutions.
It is a good idea to identify the type of material you have before making any repair. And if you are not confident about handling the troubleshooting problems outlined above, never hesitate to seek help from professionals. You can even hire a mobile RV repair service.
Now that this post has helped you with repair and maintenance nightmares, why not hit the road and do some exploring on it?