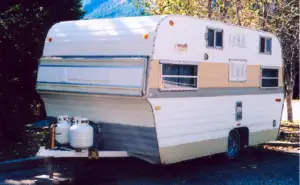
Unlike motorhomes or travel trailers, pop up campers generally don’t come equipped with air conditioners. But, one can always get one installed.
You can either go to a professional and get it done or try it yourself. So, bought a pop up camper and trying to add an air air conditioner to a pop up camper? Read on!
In this article let’s understand the basic steps you need to follow to get an air conditioner installed on a pop up camper. Remember it’s important to understand the basics or otherwise professional help is required.
Type of ACs for pop up camper
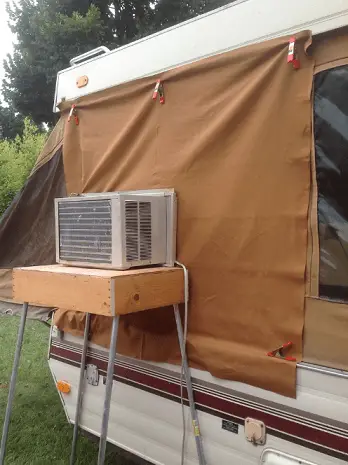
One can use three different types of ACs with pop up campers. Window mounted or portable air conditioners or one can also use the most preferable types of ACs that are roof-top types.
Each type of these air conditioners have their own advantages and disadvantages. But, roof top AC’s are more powerful and are great in efficiency. They are also less noisy as compared to window mounted or portable ones.
Also roof top AC once installed will not need any movement which is not the case with other types. Roof tops ACs can also function as heater durign winter time.
Roof-top air conditioner however need attention when it comes to installing them. That’s exactly what I am going to discuss in this article. All the steps needed to get them installed on your pop-up camper.
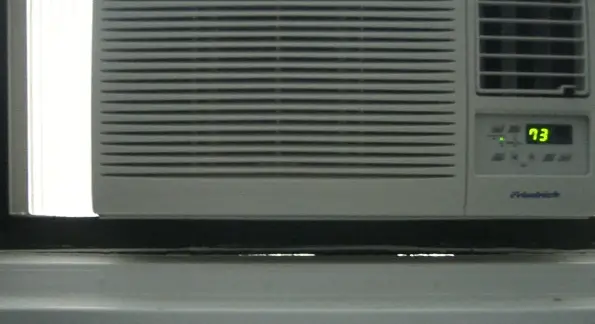
We had installed this Dometic roof air conditioner on our pop up camper. Dometic is one of the top manufacture in RV air conditioners and refrigerators, and we are very satisfied with the unit we got.
Step by Step Procedure
Lets go through the steps and understand how you can get the air conditioner installed in your tent trailer.
1. Unboxing Air conditioning unit
Take help from someone, as you will need some assistance. The unit will have a substantial weight and to remain focused you must be relaxed while working . On opening the box you will find a unit which you must take out carefully and place on the ground.
Make sure to cover the ground with a piece of clean cloth or use the same cardboard of the unit. The next steps is to unbox the air distribution unit. It will contain an air distribution unit with a mounting plate that comes under the roof of the camper to clamp the unit.
Be very careful when taking out the air distribution box. It will contain the detecting tube, connectors, wiring, and the temperature controller. A slight mishandling can cause the unit to default.
You will also find the cover of the unit that fits inside, gas kits and box to mount the wiring. The parts that come along with the air distribution box, varies from brand to brand but the basics remain the same.
2. Drilling hole
As mentioned earlier, the point to start is indicated by a screw inside the camper on the roof. Place a box right under that screw of the roof, the same box can be used in which you bought the unit.
Pop-up the camper so that the inside roof comes close to the box. On the top of the roof, use long and broad pieces of wood at least two, placed parallel. It will help you to grip yourself while you are drilling.
Please do some analysis before cutting the hole, as there are metal plates going through the fiber-glass roof. While drilling in case you cut or destroy the metal plates, you will be in real trouble. The size of the hole should be about standard 14by14 inches as mentioned earlier.
3. Clamping the unit
With the help of your assistant carefully place the unit on top of the roof; don’t drag as it will bring damage to the lower end of the unit. These systems are delicate. If not handled properly can result in damage. Thus, be careful and vigilant in the procedure for a successful installation.
If you are not able identify the flaws early, you will not be able to detect them later. Place the Air conditioning unit in a vertical manner and let the power cord fall inside the camper using one of your hands.
From inside the camper, use both of your hands to bring the unit in the center by lifting a bit until you reach satisfaction. Make sure that the unit is in the center of the hole. If that’s not the case you will not maintain the center, you will face problem in fixing the air distribution unit from inside.
4. Fixing air distribution box
Take the air distribution unit; it will already have four holes in the corner, if not then do it prior. Use an extra space to put in between fixing of air distribution unit and the air conditioning unit.
The air distribution unit contains a foam cushion, but an extra one will help in avoiding the plate and unit to contact. Now attach the plate with the unit by tightening the screws, do it in an oblique manner and don’t tighten them too much. They will keep on tightening and will ultimately get loose and free, so stop there where you feel they are adequately firm.
Now connect the power cord to the center connector. Please be very careful with detecting capillary bulb which is inside the air distribution unit. Temperature controllers are visible now from where you will be able to control the temperature.
5. Connecting the electrical supply
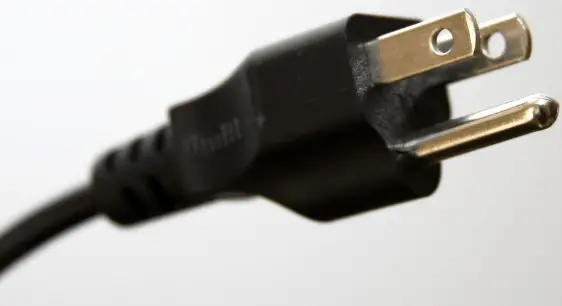
Now in this step, you need to connect the unit with the connector, preferable to use Park Power connector that comes with covering from outside and a boot from inside to put on the connector when you have connected the wiring.
Use 12 number wire and measure from inside of your unit to the side wall where you want to fix your connector. From outside there are screws to fix and a lid to cover which will probably be securing the connector from rain.
Measure the length of wire correctly in order to avoid the wire getting short to cover the required length. Cover the wire with a wire channel to give a neat look. Once you have connected the wires to the inside wall of your connector, you need to connect the other end of the wire to the air distribution box.
Use the manual for better understanding in case you require help. Use insulation tape on the connectors for keeping the wires and grips firm. Now place the air distribution cover to close the unit by properly fixing it using the grips.
Brand varies from one another; some have grips and some are with screws to hold the cover from inside. If there are no holes for the screws and obviously no grips, then you need to pre-check for the holes and do it if they are missing.
6. Connecting wires to AC power supply
Reach out to the converter box and the main power supply. Expose the convertor box and disconnect the power source of 120 volts and battery first. If you don’t, there is a risk of an electrical shock.
The wiring of AC must be of 20 amps and wire size must be of number12. Use 12 number wire and connect to the breaker in the converter box. Also, you need to make the junction box for the cables to connect and later on give supply to the external wiring.
Also while making the junction box, use the accessible location to clamp the box for better accessibility to the breaker. Connect the wires properly to the breaker. Use extra precautions in doing it, as the wrong connection can cause a mishap.
In case you think you need assistance please read the manual and do it the right way. In order to connect the connectors and breakers, the wire must be of adequate length to reach the desired circuits.
If they are stretched and tightly connected, chances are they will disconnect soon. Study it thoroughly before the demonstration, investing your money, effort and time do have a price.
7. Creating external power cable connectivity
I would like to mention this again, to use 12 number of cables and weatherproof connectors. If not, then the system will function on load and ultimately collapse within a short span of time.
Following the standards is integral as a deviation from them may cause serious harm to the unit. As mentioned earlier, there will be one connector installed on the side of the wall from inside the camper, through the air conditioning unit.
Another was connected to the breaker with the junction box we made. Now we need to join these two, to the two ends of the external cable. Meaning one end of the external cable to the outside wall of the socket created earlier from inside the camper.
It must be noted that when you connect the wire to the socket outside you need to pop up the trailer. It is because you can take the wire to its maximum height and then coming to the second end to connect it from inside.
If you don’t pop up the trailer before, the wire will fall short. The second end of the external cable will now be connected to the junction box, created inside the converter box.
8. Reconnecting power supply & battery
You must be very excited now as you have come to the final stage. Before turning on the power supply and reconnecting the battery, just go through checking all the connections for the last time. It includes checking the connectors, breaker, sockets and the wiring.
The purpose here is to be very sure before letting the whole system to function. Check specifically the wire connections made into the circuit breaker, the junction box and the long cable that is the main part of the system.
Now you may switch on the supply and AC on the breaker. Reach to the panel and switch on the air-conditioning and set the temperature controller. Enjoy your air conditioning and don’t forget to remember the technical information and the precautions to take, explained earlier.
Some technical information and Precautions
The AC brands preferable to use for RV’s include Advent, Coleman, and Dometic. The reason is because of their durability and performance as compared to other brands in the market. You can get these for few hundred dollars and they roughly weigh about 75-80 pounds.
Different RV types will need different sized AC. The power or watt requirements of AC in RV will also depend on the size of AC and also on the area of the camper.
Along with the unit you also need to buy an air distribution box as well that wont cost you much. Before we proceed for the procedure, just make sure that your pop up camper is properly based and it pops up smoothly.
When you go inside your camper, you will notice exactly at the center of the roof that there will be a screw. It is actually the result of making a hole of approximately 14by14 inches. Also, you need to keep a check on the weather too, as you will be doing this procedure right under the sky.
If it rains it will ruin your work and damage the parts, do close to something like a shade or a garage in case of rain you can save your things quickly. The duration of the installation should take around 5-6 hours.
Does the air conditioning really work with pop up camper?
Yes air conditing works with pop up camper or tent trailers even though most pop up camper may not be initailly euipped with AC. A lot of people want to know if they can have an air conditioner installed on pop up campers.
A lot also depends on what kind of AC you are gin to use. A roof-top AC is always a good option but you should get properly installed. Another thing you should be aware-of is the size of the AC to get. Air conditioners size is measured in terms of BTU.
Bigger the size bigger BTU AC will be needed. A pop up camper is much smaller and you may not need a bigger size AC like a 13,500 BTU. You should also make sure that you don’t get a very small sized one. A smaller BTU than needed will obviously not cool the camper.
Read : Tips For Camping in a pop up camper
For a 150 square foot area you would need a 5000 BTU AC. A 250 square foot area would need around 6000 BTU and so on. So, just get this calculation done based on the square foot area of your tent trailer.
Conclusion
It is imperative to mention that the information provided in this topic is ample to understand the basics of pop up camper air-conditioning procedure. The results may vary on the success level, depending upon the type of brand used, cabling and quality of parts.
It is advisable to read the manual of the product properly in order to get a fair idea about the assembling and handling of parts. Also, make sure to check that the boxes of the main and spare parts are properly sealed. Hope you find this information useful.