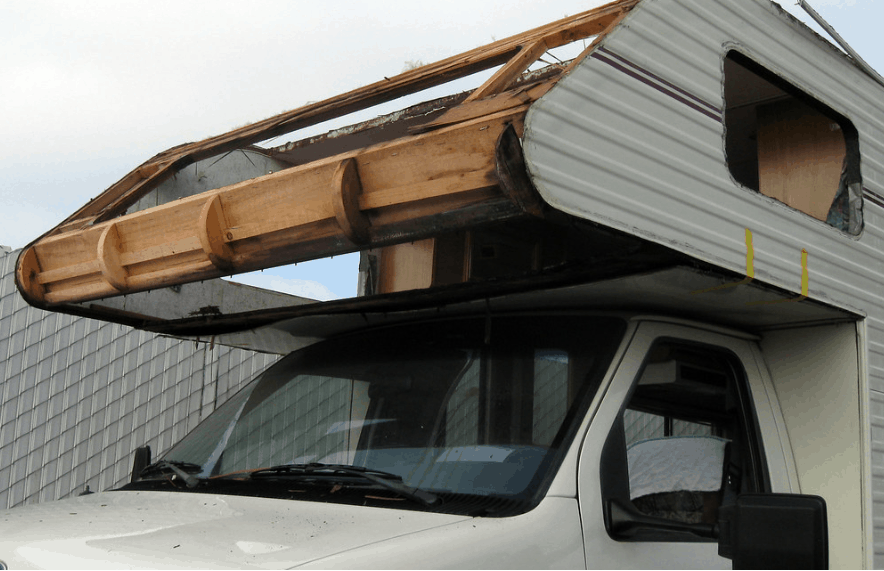
Water damage in RV is a very bad thing. It can create health problems from the resulting mold and the repairs can be costly. Sometimes the repair costs can be so high that they could be higher then the RV itself.
To makes things worse, most RV insurance plans do not cover water damage. Thus, any repairs resulting due to such issues lead to costs from your own pocket.
Water leaking in from loose seals on roof, windows or vents starts the water damage. Water can also leak from slide out, floor or cracks on walls.
For any residence, but for RV’s in particular, water damage is major. And can be detrimental not only to your health but to the structure.
It can become unavoidable and if the water damages the machinery within the RV then it can ultimately become not fit for purpose and will be unusable. Therefore it is essential that if and when you find water damage that you know how to fix it.
One can fix minor water damage in RV but for major repairs a professional help will be needed. Identifying the water damage in initial phase therefore, can save you from costly repairs.
Water damage on floor, if left unattended, can ultimately lead to major issues which cannot be fixed easily and will need floor replacement.
It can become hard if you just ignore it. Therefore, its always better to fix it on time.
In this article, we will see detailed steps for fixing such damage.
Steps for fixing water damage in RV
Before implementing the repairs its always better to get to the root cause. This will save you from more repairs later on.
Identify the leak
Find the cause of the water leak and repair the leak before repairing the damage that it has caused. If you do not repair the cause of the damage before repairing the damage then the next time that there is rainfall, more damage will occur to your recreational vehicle.
It is common for most leakages to occur from the windows or the roofing and thus, windows should be checked and the caulking redone if necessary.
The roofing and exterior walls should also be checked. And be repaired as efficiently as you can by using a strong bonding waterproof tape to put an initial stop to the leak before calling out a professional who can stop and repair the roof or walls for you.
Overall cost of fixing the water damage in initial stage can be less. But, if you ignore it, the later cost can be high.
Check out below video that shows how the water damage repair can be done. In travel trailers or other RVs, this is how you should approach the repairs on your own.
Now lets see the steps in doing the repairs on water damage.
1. Soak up water
If the damage has gotten inside of the recreational vehicle then you should try to soak up as much of the water as is possible .
2. Allow damaged wood to dry
It is inevitable that any leak within your recreational vehicle will cause damage to wood within the vehicle. Thus it is important that you allow all of this wood to dry out fully before you start to repair it.
3. Attend to the features of any water damaged area
It is essential that any small loose pieces of wood or any areas of wallpaper are pulled off as soon as they are spotted within any areas that are damaged by water.
4. Apply a wood hardener to any water damaged wood areas
These can either be painted or sprayed directly on to the water damaged wood area and this will penetrate deep into the wood and harden in order to prevent wood rot. It is essential that you wear a mask and open all available windows when using these products and that upon finishing, you let the hardener dry for a twenty-four hour period.
5. Apply wood filler to water-damaged areas
After the wood hardener has completely dried, you should apply wood filler with a putty knife or similar instrument. This will help to fill in any holes or cracks that have appeared as a result of the water damage. Once applied this should be left to dry for a four hour period.
6. Use sandpaper to sand the dry wood filler
Using fine grit sandpaper, sand the wood filler to smoothen and even out the surface of the wood, in order to get the wood to a state that it can be decorated again.
7. Redecorate
After the repairing, you can then stain or paint the wood, or apply wallpaper to decorate the recreational vehicle back to your tastes and choices.
8. Be thorough
Don’t just cast an eye over areas, run your fingers and hands over door jambs and windows seals, both inside and outside the RV as well as the seals of the roof.
How to identify if its the water damage
The first thing that RV or motorhome owners need to know is that whether you think your RV has a leak or not, you should always check for any signs of water damage to your recreational vehicle. It is essential that owners know what water can do to an RV. And what to do when water damage is found as water is the quintessential silent killer of recreational vehicles, as it may be there without you even knowing about it.
What is most affected
Water damage is commonly found within the wooden structures of the RV such as inside cabinets, compartments or cupboards, under windows or any areas of the outward exterior that has got a hole or been pierced in any way. Consequently, it is important that any owner always casts a watchful look over the RV to check for bubbles or bumps in the wood or paneling of the vehicle, dark coloration of the wood, issues with the fiberglass or any stains.
Water damage can occur at any part of the RV but it is more likely to occur at below locations.
- Ceiling
- Under windows
- Inside compartments or cabinets
- Walls
- Floor
- Slide out
Doing regular checks and inspecting for cracks, loose seals, or other signs at these locations can help you in quickly identifying and fixing it.
Look for signs
Another sign of water damage is that of discolored or wrinkling wallpaper or rusting of the screws and nails within the RV, as well as rust stains or discoloration that occurs around or underneath the window areas.
To know if your RV has water damage, look for below signs:
- Discoloration, specially near windows, door or ceiling.
- Delamination of fiberglass.
- Soft softs on the floor.
- Wrinkles on the wallpapers.
- Stains or dark rotted wood on the RV body.
- It feels damp and usually produces musty smell.
Water damage will not always be visible to the eye. And so occupants may notice with other senses such as smell, as water damage can give off a musty smell that occupants should appear to notice as well as discoloration amongst the tops of the walls or upon the ceiling and areas of the floor that can feel spongy to walk over.
Rotted floor repair can be hard and costly as well. If the damage is too much you may have to replace the floor. Check this guide on steps to repair the rotted floor.
Preventing Water damage in camper
The main thing to remember is that water damage should never be ignored. It should always be repaired in order to prevent wood rot, and if found on time water damage can be fixed at relatively low expense. However, even if the damage was detected late and has already caused the wood to rot, it is still repairable.
As well as the wood, any carpeting or flooring such as linoleum or vinyl can also be taken up and replaced if damaged by any water. It is also possible that if severe water damage has occurred then the whole wall or roof may need to be replaced. If that is the case then do not be scared to rip out the wall or ceiling in order to remove the decay from your vehicle, as all damage must be removed including any parts that appear soft or to be rotting.
RV leaks occur mostly at locations that have openings like roof, windows, under the cabinets and slide out. On the roof, around the areas with roof vents, antenna and AC, the caulking seals may dry up and allow water to leak. Same is the case with window or slide out seals that may allow water to leak in with time.
To avoid such leaks make sure you redo seals before they worn out.
If it is the framework that appears to be rotten then it may be possible to cut out the rotten piece carefully rather than taking out the whole framework.
How much is the damage
Hopefully, you have been lucky and been able to ascertain where the leak is coming from. However, if you have not been that lucky, when the next rainfall hits, go inside your RV and try to find where the leak is coming from. This will enable you to patch up the leak to prevent any damage.
Once you have patched up the leak it is recommended that you wait for dry weather. Then leave the RV or travel trailer to dry out completely. Make sure the windows remain open to release moisture from the air.
Before we conclude on this guide, let me point out few things that will save you from major costs in repairs.
✔️ Focus on finding leaks and get them fixed as early as possible. Most leaks go unnoticed which later results in major water damage issues.
✔️ Do regular checks preferably before and after winter/rainy season. Check for seals and replace if needed. If putting the travel trailer in storage, make sure you repair all the cracks, gaps.
✔️Avoid harsh weather as far as possible.
✔️ Do not park travel trailer with low hanging tree branches or anywhere that can result in damage to the roof or walls.
✔️ When buying a used camper make sure to avoid those with water damage. Try to avoid old rigs that are older than10 years. Such old travel trailers are highly prone to water damage and therefore, avoiding them will be your best decision.
Conclusion
Holidaying in a recreational vehicle is an amazing way to take a holiday although it is important that it is always checked and repaired if necessary. Water damage, unfortunately, is part and parcel of owning a recreational vehicle. However it does not have to be the end of the world.
RV insurance companies do not include the water damage and thus doing regular checks to prevent leaks is utmost important.
If any of the signs of water damage are caught and repaired early enough then it can save you a vast amount of money. It is essential to note that RV’s are often moving around and as a consequence, the vibrations of the road could cause seals to open and condensation and water to seep in and damage your vehicle. However, water damage is nothing to be afraid off and after reading this article you should have a firm knowledge base on how to deal with your water problems.

