A leaking RV roof is such a pain and you definitely don’t want that in your next RVing trip. A leaking RV roof not only means it will start dripping inside when raining but will also mean heating and cooling loss.
If you have been RVing in winter then you know exactly what i say. A very cold weather and lack of insulation or leaking roof will make it chilling cold inside. Similarly, a leaky roof will lead to efficiency reduction in air conditioning. Making sure the roof is resealed on time will also help you in increasing its life or at-least save on major repair costs.
How do you reseal the roof
A lot of times RVer get wrong advice on how to reseal the rv roofs. Its critical that you follow manufacturer mentioned process and timeliness so as to stay good in warranty. If you happen to do it as you want then there are chances that you will violate the warranty rules.
Next important point is what sealant you have to use? This will depend on the type of roof you have. You should use proper compatible sealant otherwise it may turn bad for the roof.
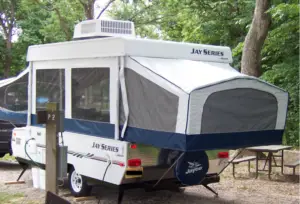
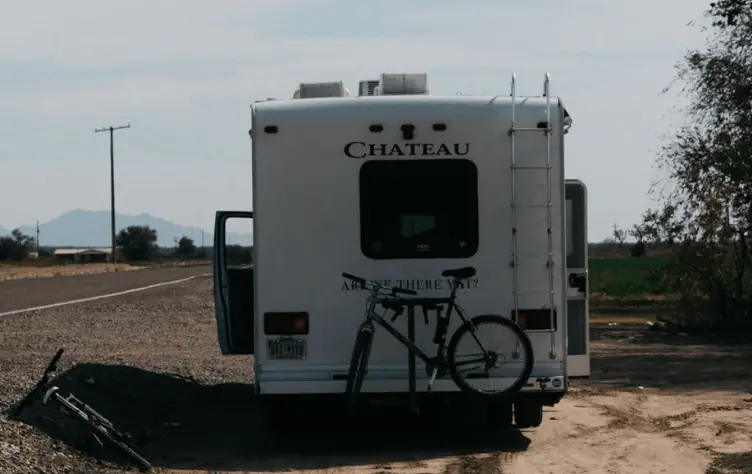
Most new RV’s are equipped with rubber roofs. Fiberglass is also used but it isn’t that popular.
Aluminium are sturdy but they put a lot of weight and hence not much used now. It is surprising that a lot people do not know what type of roof their camper or motorhome has. This is the case with new Rvers mostly. Lets quickly put the roof types, their pros/cons and then move on with how to reseal the roof coating. Understanding the roof type is critical as otherwise you wouldn’t know how to deal with resealing.
Rubber : These are most common types. They can be EPDM (Ethylene Propylene Diene Monomer), or a TPO RV roof (Thermal Poly Olefin). EPDM are slippery where as TPO types are glossy.
Fiberglass : These aren’t that much used, they are hard but need less maintenance as compared to rubber.
Aluminium : More than likely your new RV will not have aluminum roof. They are very rare now. They too are low maintenance as compared to rubber but they obviously put more weight and therefore manufacturers aren’t using them.
Why use roof sealant for RV?
Maintaining the RV regularly is key to keep it in good conditions. RV’s anyways are so high depreciating assets that not taking sufficient care will increase the depreciation further. Roof of the RV is critical and any negligence in keeping it free from leakage can make it worse.
So, why exactly one needs the sealant and why do you even reseal the RV roof? Lets find out the exact reasons.
1. Need to prevent roof leaking
Now that’s the obvious one. Would you continue having a leaky roof for your camper? Definitely no! The sealant helps in making sure the roof leaks are filled and also helps in preventing further deterioration. Get an rv roof sealant immediately and start the work if you have any doubts on the roof.
2. Helps in providing vibration and wear-tear resistance
Another reason why you should have a sealant on board is because it will help in preventing tears on roof due to vibrations. A RV moving at speeds, brushing against tress can result in wear-tear and having a sealant can help in preventing it.
3. Keeps RV roof safe and increases the life
A RV roof no matter of what type will deteriorate with time and will need replacement or major repair. But, if you use sealant on time then you can increase its life very much. A in-time fix using sealant can ultimately help in avoiding bigger repairs or replacements. Painting the motorhome or RV roof when needed can also keep it in good condition.
4. Helps against UV radiation
UV rays can make your camper or travel trailer roof loose its strength. With sun shinning bright, the RV not only gets hot but UV rays can result in loosing its sheen. RV roof paint gets affected due to UV rays. Choosing right sealant can help protect those areas that are more susceptible to effects due to UV rays.
What caution to take
When dealing with RV roofs there are plenty of things to be caution about. First and foremost is obviously the one that can cause damage to you. When walking on the roof be sure that you are safe and will not fall down.
The RV roofs can be slippery not only in winter or rainy season but also when its summer time. The reason is the material type that is used. Rubber roofs or even fiberglass roof can become slipper due to wear and tear over a period of time.
Another thing is how much weight can your RV handle. Most RV’s are good enough to handle a one or two persons weight. But, with time the roof may loose its strength. So, be careful when walking on the roof.
Is the RV equipped with ladder : One important aspect to take a note of is, whether the RV has a ladder or not. Now, what does a ladder has to do with the weight? Well, if the RV is equipped with ladder then its roof should be good enough to handle weight. Otherwise just think that the travel trailer or camper isn’t made to handle weight on the roof and that’s why they didn’t give a ladder as an option.
Sealing the RV roof need to be done using proper products else you may end up damaging the roof further. Also, if the RV has been in warranty then take caution in not doing things yourself. Rather, just take your RV to a professional and take proper advice before repairing anything.
Cleaning intervals : Next caution that you need to take is related to the cleaning methods and intervals. No matter what type of roof you have on your camper make sure its cleaned periodically. A rubber type roof should be cleaned at least 4 times yearly. It also depends on how you store the motorhome or trailer. An openly kept RV will attract more damage as compared to the one that’s securely stored or at last covered using RV cover.
Enough time to work : Another thing to be careful is making sure you take out enough time to work on caulking. It should take a lot of time if you are keen on working on the entire roof. If you are willing to do it only for a certain already identified gaps then that’s okay.
A roof of 30 feet or more RV is definitely big and will need good amount of time to complete the work. If possible take help from family members or friend to get it done as fast as possible.
Weather forecast : Next thing to keep in mind is that the forecast for the day should be good. Working on the roof and then if it rains or snows will obviously spoil the work. So be sure that its nice sunny day.
Cleaning the RV roof will be needed but if the cracks are wide and then it will start to leak. So try to make sure such areas don’t get too wet and be careful.
Cleaning the RV Roof
Make sure the cleaning agents that you use should not have citrus components, harsh abrasive or petroleum products. This can be damaging not only to rubber roof but also to fiberglass and aluminum roofs. So be aware what cleaner or conditioner you are using to clean the RV roof.
A lot of people end up using wrong products and that causes permanent damage to the rubber or vinyl materials of the roof. So, be careful and educate yourself on these points. Cleaning should also not be done using hard brushes, you should go soft using brushes that wont cause the damage.
If you don’t want to use a ready made product then you can also try home made solution made using detergent and warm water. Now, this can work for cleaning not so dirty roof. But, for hard tough dirt stains or molds make sure you use proper treatment.
Also, make sure you don’t end up cleaning so much so that its finish is lost. Go easy but make sure you check on the roof periodically and get it cleaned as and when needed.
Cleaning of the RV roof is the initial thing but that’s just one thing. Most important check to perform is to inspect for any leaks around openings on roof. Any leaks or cracks can result in water leaking inside the RV. You need to inspect and reseal those spots as early as possible. The more time they will remain unfixed, the more they will become harmful.
Identify those potential roof sealants for any chance of leak. Then get the right sealant and reseal every such areas. If you are not sure as to what will work for your camper roof then speak to your dealer and get the right one. Getting the compatible sealant for resealing the roof is critical. Try to get sealants that will seal such seams permanently.
What equipment will be needed?
Applying the caulking again will need number of components. Lets list them out.
- Carpet blade : to remove already existing caulking so that newer one can be applied.
- Caulking : get tubes of caulking depending on the type of roof it is.
- Trash bag : to collect all the removed caulking
- Caulking gun
- Ladder : to climb up. If the RV is equipped with ladder then you don’t need one obviously
Types of sealant
Whether you own a class C RV or class A motorhome you would need these at some of time for sure. There are two types of sealant that you get. One is a tape and the other is in liquid form. Both of them can be great but it depends on what type of roof you have and how much is the damage already done.
1. Adhesive Tape
It comes as a rolling tape that can be applied as needed. You can make use of tape for corners or any other places, its easy to use. You can use it for different temperatures as well. Its a cost effective way of sealing.
2. Liquid type sealant
They are better to use as you can put it using a bottle with narrow opening. There are lot of brands that make this kind of sealants as they are easy to use. They can provide good resistance and seal the gaps in roof thus providing good resistance for heating or cooling loss.
Best RV roof sealant that you can use
So, you haven’t done that before and wondering what sealant to use? Lets check out various options you get online and also see their pros and cons. Its a small product to buy but remember a wrong one can make things hard for you. So be sure you get the right one for your costly RV. Here the top RV sealants that you can purchase online,
1. Dicor 501LSW-1 Lap Sealant
Dicor is an excellent sealant that can work well for different materials. It lasts very long and will work well in different weather conditions. Use this sealant to be free from all the worries related to roof damage. It works really well with EPDM roofs.
2. 3M Marine Adhesive Sealant
This is long lasting sealant that you can use to prevent roof cracks and fill the gaps. It is little bit pricey but is definitely worth it. You can use it for fiberglass as well as rubber roofs. Its a high endurance sealant that will keep the roof protected in different conditions.
4. ToughGrade Self-Leveling Rubber Roof Sealant
This is great sealant that you can use on RV roof including air conditioner gaps, vents. It works well and prevents deterioration in case of UV rays. This sealant however may give irritation to some people so be careful when using it. It works really well to protect and prevent cracks and gaps.
5. Geocel 28100V Pro Flex Crystal Sealant
You can use geocel for different surfaces and is also easy to use. But, you may find that it may not be great when working on EPDM o TPO roof materials. One good thing with this sealant is that it comes in different colors, so you can select color depending on the one that goes well with the roof color. Its UV resistant and also helps prevent mildew making it last longer than others.
5. Sashco Through Roof Sealant
This is one of the tops products that work well in all temperatures. Will work for almost all types of roof materials. It also doesn’t give that bad messy look for your fixtures. Its reliable and will work for different materials. This definitely is a permanent fix that will help prevent leaks and cracks. This sealant however may produce chemical smells initially but i guess that should be okay as long as it helps prevent the damage.