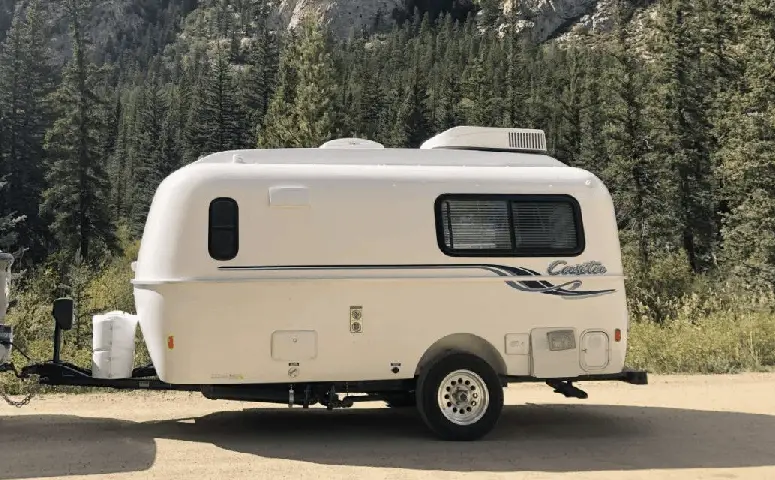
Whether you are planning to go on a road trip with your family and friends during the hot summer or freezing winter, you need to know how to insulate your fiberglass camper.
Effective RV insulation methods and materials will help you save plenty of money on energy costs by preventing cool air or heat from your air conditioner or furnace from escaping.
In this article, let me walk you through various ways to insulate fiberglass camper and determine the best technique for you. I have found this ways to be very effective and it does help in preventing heat or cold air loss.
Fiberglass Camper Insulation
Fiberglass is the most popular build for many travel trailers available on the market. Some of toe fiberglass campers include below:
- Scamp Trailers
- Escape
- Casita Travel Trailers
- Airstream
- Oliver Travel Trailers
- Bigfoot RV
- NuCamp
- Barefoot Campervan
It is a high-quality and durable material that works best for maintaining consistent temperatures, even in extreme weather conditions.
This material has a high R-value, which is the official thermal resistance rating.
The R-value is a specific value that indicates how well your camper’s walls can insulate against extreme elements. The higher the R-value, the more efficient your camper can maintain even temperatures.
As a result, fiberglass campers are perfect for people who enjoy camping in colder or hotter temperature zones.
However, such fiberglass material is not best for traveling to areas with different temperatures within a short duration.
In such conditions, moisture gets into the insulation, causing it to expand and possibly promoting mold growth on the walls. Thus, the R-value reduces over time, and the insulation becomes less effective.
Luckily, there are several ways to increase the insulation efficiency of your fiberglass camper.
Fiberglass RV manufacturers offer several features, like full heating units and insulated underbellies, to significantly streamline insulation.
Let us look at some ways to insulate your fiberglass camper effectively.
1. Seal windows with bubble wrap or use curtains
Windows are the best means of defending yourself against extreme cold weather conditions.
Many old campers have single-pane windows, which is quite inefficient for insulation. Not only do they let cold air seep in, but they also allow heat loss through the glass.
Likewise, some Class A and Class C motorhomes have double or triple-pane windows, which are thicker but not as durable because excess vibrations can lead them to crack.
If the manufacturer of your fiberglass camper does not offer any air conditioning or heating upgrades, you may want to seal or replace its windows.
But first, make sure you check whether the manufacturer has a viable warranty that may offer an upgrade for better window quality. Take note that tampering with your fiberglass camper’s windows may void any warranty that might still be in place.
So, it is best to check with your manufacturer before making any third-party alterations.
Replacing your camper’s windows is an expensive process compared to sealing them. Take time to choose a suitable window type for your camper, and you can opt to fix them yourself or enlist the services of a professional.
Upon choosing your preferred windows, unscrew and remove all parts of the existing window frame. Using sealant, fix your new windows into the window frame and use new screws to fasten the window to the camper’s siding.
Sealing your windows is another effective way to insulate your fiberglass camper. Examine your window frames and reinforce any parts with visible signs of wear and tear. Then, use bubble wrap and double-sided tape to secure your windows.
You can opt to spray the windows with water instead of using tape to create a clinging mechanism for the bubble wrap.
The bubble wrap provides an insulation layer that does not obstruct natural lighting, which is vital, especially during winter. You can also consider using insulated curtains that can reflect heat inside the camper.
2. Add weather stripping to door
Doors are another area that causes insulation problems due to their drafty nature.
Many factory-issued doors do not have the best weather-prevention tendencies. Thus, you may prefer to buy weather stripping and add it under your door. Weather-stripping is a heavy material that you put at the bottom of your camper’s door to prevent outside air from entering.
You can find weather-stripping materials from any local home improvement store or an online vendor.
However, the stripping tends to wear out quickly, making it not the best solution.
Alternatively, you can make a makeshift weather-strip with a blanket, t-shirt, or towel.
Roll the material into a log-like shape and place it at the bottom of the door to decrease airflow. Remember to fit the fabric on all doors and reinforce it every time you open the door.
You could also opt to use a thermal curtain and hang it in front of the door. If weather-stripping seems to be ineffective, you may choose to re-caulk the area around your door, which should be part of the annual maintenance of your camper.
Fill in any holes or cracks around your door with extra caulk to create a quality and durable seal. You can also opt to replace the doors altogether and invest in those with an energy-efficient rating.
3. Replace thin layer insulation on Walls
Another way of efficiently insulating your fiberglass camper shell is by reinsulating its walls, similar to how you did to its windows.
However, it is also vital to contact your manufacturer and confirm whether you have a working warranty in place that may become void if you alter your trailer.
If it does not affect your warranty, you can replace the thin layer of fiberglass insulation along your camper trailer’s walls.
While this repair can be quite complicated, it is best to contact a professional team to do it instead of doing it on your own.
Check this complete guide on doing such repairs on fiberglass campers.
However, if you have experience with handling trailers, you can proceed to perform the repair yourself.
It is also vital to note that fiberglass foam insulation is not durable as you may have to replace or repair it occasionally.
4. Attach Skirting to camper
Skirting your fiberglass camper aids in insulating it from cold temperatures and maintaining even temperatures.
It involves fitting a layer of fabric against the perimeter of your RV. Make sure to search on Amazon or Google for skirting specifically designed for your fiberglass camper.
Even though the search may come up empty, there are various generic options available.
Look for a rail, also known as channel systems, that runs along the entire exterior wall of your camper.
Affix one end of the skirting material into the channel and continue sliding it through until the base is fully covered.
For campers without these channel systems, you will have to use T-snaps or buttons available in most retail camping stores.
Once your skirting is in place, you can opt to use additional foam boards or weights to secure them to the ground.
Skirting your fiberglass camper has plenty of benefits.
- For instance, it helps with keeping hot air inside and cold air from accessing the interior, hence, saving on energy costs since you use less propane on the heater or air conditioning.
- Likewise, skirting enables the underside of your camper trailer to serve as extra storage space and protects your tires without using separate tire covers.
5. Make use of vent cushion
Vents in your trailer are another source of insulation problems. Closing them can help in remedying the issue, but you have to exercise caution as forgetting about them can put you and your camper at risk.
For instance, cooking inside your camper with the vents closed could result in carbon monoxide or dioxide poisoning.
Additionally, closing vents, especially during the summer, could lead to poor air circulation, which may promote the growth of mold and plenty of moisture damage in your fiberglass camper.
So, if you plan to close the vents of your camper, it is vital always to remember when they are open or closed.
Among the best solutions to close your vents is by using a vent cushion, which is readily available at any camping store.
Vent cushions help in stopping heat transfer, thus, keeping your camper warmer during the winter and cooler during the summer. Installing them is relatively convenient as you only have to climb up your vent and place it at its top.
However, you should beware that most vent cushions are sized to fit specific vent sizes.
As a result, it is best to measure your vents before making a purchase.
Some vent cushions also have reflective coatings to keep UV light away from your camper.
Thus, if you are dealing with insulation problems during the summer, such vent cushions could definitely come in handy.
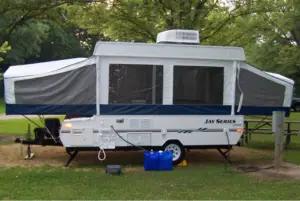
This methods can also be used with other camper materials like aluminum and also with other camper types like truck campers or pop up campers. Pop up campers with canvas do need to significant efforts like using gizmos and so on.
Conclusion
If you are fond of traveling throughout the year, it is likely that you are always on the lookout for new and innovative ways to insulate your fiberglass camper. Luckily, with the tips mentioned above, you will effectively keep your camper cool during the summer and warm during the winter.
However, before trying out these effective insulation solutions, it is crucial to weigh between getting upgrades or insulating your camper on your own and getting a new fiberglass camper altogether.
Many fiberglass camper manufacturers offer world-class heating and cooling features, making it more convenient to buy a new fiberglass camper instead of continually investing in your existing one.
However, if you are looking for a short-term fix or not ready to upgrade your camper, the insulation techniques aforementioned are among the best and most effective solutions for your fiberglass camper.


