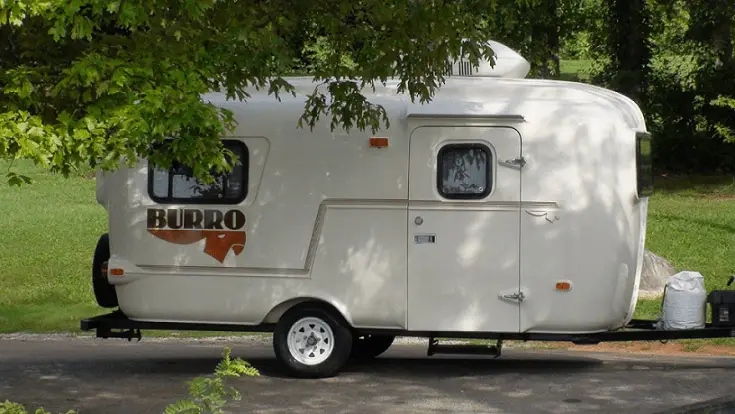
It is possible to repair fiberglass on RV as a DIY project, but for a major damage it is always recommended to go for a professional RV repair service. An improper fiberglass repair can also result in further issues with the structural integrity of the camper due to delamination.
You also need to be aware of the safety concerns while working on the fiberglass repair. In order for you to repair the cracks or holes on fiberglass you will need number of tools and also skill to work on filling the damage.
Before you jump and start the repair yourself, be sure to know that there are good number of reasons to avoid such repairs by yourself.
- The holes, cracks and the overall damage is too big to fix it by yourself if you have no experience in doing such repairs. You don’t want to end up enhancing the damage. An improper fixing can result in bigger structural problems later on like delamination, which can be a costly fix.
- The damage is deep and may be affecting the camper structure.
- When the camper is Under warranty you may want to check with the company before touching it. You also need to check if the damage repair can be considered by insurance. Issue like delamination may not be covered by insurance.
- Amount of time it will take. Honestly, when you are busy, it may not be for you. This will need some free spare time and effort, plus some patience.
- When you own that luxury, costly RV, you don’t want to risk the failure in repair.
There are good reasons you should repair the fiberglass on camper yourself as well. Believe me, a lot of us end up paying thousands just to repair minor cracks and holes that could have been fixed as a DIY project in under $100.
- Minor cracks, small holes that need little effort to repair.
- Cost considerations. Such repairs can be costly even when the whole work may not be much. One can avoid such costs by doing it as a DIY project.
- If left unattended such minor fractures can later result in fiberglass delamination which is separating of fiberglass gel coat from the inside layer. Such issues can result in major issues with moisture or water trapping in.
Before you repair the fiberglass damage on your RV by yourself, make sure you analyze the damage to check if it really needs professional attention. Check with insurance company, RV dealer/Company on warranty, if it can cover the costs. Compare the professional repair costs with DIY repair as well before heading for the repair shop straightway.
What you will need
Before you plan on getting the broken fiberglass fixed be sure you have all the items and tools needed for the fix. Remember when working with fiberglass its utmost necessary that you protect your eyes, nose, mouth and hand with good protection.
Be sure you are wearing full sleeves shirt to protect your body as well. You will need below items to work on fiberglass damage on camper. Based on how big the repair is some items may not be needed.
- Gloves
- Eye Glasses
- Mask
- Fiberglas resin
- Additional adhesive or hardener to mix with the resin
- Fiberglass fabric/mat pieces enough to fill the crack or hole
- Sanding machine and sandpaper of different grits
- Fiberglass repair kit
- Foam Insulation, in case insulation is damaged.
- Drilling machine
- Primer and machine to prime.
- paint
- pant brush for applying raisin
- Fiberglass Body filler
Minor Self repair of fiberglass on camper can cost you between $50 to $90 excluding major tools needed for fixing. If you visit a repair shop that specializes in such fiberglass repairs then they will quote you based on the damage present. They can quote around $500 for fixing Small cracks, holes.
Self repair of broken fiberglass on RV comes with risks of improper fixing causing further damage resulting in more costs over long period of time.
RV Fiberglass Repair Steps
Start by analyzing the damaged fiberglass. If its a deep hole then the insulation may also need to filled in. For shallow gelcoat surface cracks you should be fine with fiberglass mat filling alone. Start by cutting the excessive hanging fiberglass parts and get all the edges smoothened. Further the smoothening process by using sandpaper.
1. Sanding the crack or Hole
First step is sanding. Use sander or grinder for this. Can start with 80 grit sander and slowly do the work to make sure you are working on the edges. Identify the damage and make a v shape to work on the damage.
Make sure you carry on with this activity slowly and do not overdo else you may end up causing more damage. Sanding is done basically to clean the damaged surface and make it as smooth as possible at the edges.
This helps in later part to hold the fiberglass mat and resin else you may end up doing the whole processes multiple time’s as the mat wont hold up for long. Clean the surface with acetone or any other fiberglass cleaner.
Once you are satisfied with edges you can move with the next step.
2. Apply Resin
In this step, you would apply the resin on the cracks or holes and get it filled enough that can hold the mat. Most common resin that many use is “Bondo”, you can choose whichever you are okay with. There are several options out there in home depot or amazon. Choose the one that is recommend for fiberglass.
Use a paint brush or resin applying brush and apply it at the damaged surface. Use multiple layers to fill it until you are sure it would hold the mat. Some people also use additional adhesive that enhances the ability to hold the mat. Based on how big the damaged hole or crack is, you can choose whether to mix the additional adhesive or hardener.
Follow the instruction related to quantity to use which will be given on the package. They may also specify the type of hardener to use as well
3. Fill cracks or hole with fiberglass mat
Next step is to stick the mat on the resin. You can cut the mat into thin pieces and get enough to fill the surface. Use several pieces until it is filled fully. Before applying the fiberglass mat or cloth you can dip it in resin as well. This will make sure it sticks better.
Once you place several pieces on the surface, apply additional coats of resin to fill it fully. This wet filling will need sufficient time to dry, so relax and wait.
4. Let it dry
Make sure it dries thoroughly before going to the next step. Make sure the RV isn’t placed outside with wind blowing else dirt, dust may stick on the resin causing bubbles and the job wont be perfectly done.
5. Sanding the dried mat and resin mixture.
Next is to sand the surface again. This is to make sure the surface remains smooth and flat. We don’t want it to look ugly and also the later part of the jobs needs it to be flat.
Use sanding matching or hands to get the surface as smooth as possible. Clear the edges where extra mat was applied. Clear the powder that’s was generated with sanding. Once this activity is done, you need to identify if there are any pin holes, bubbles left. This need to be filled to make sure the job fix is done perfectly.
6. Apply body filler
Apply body filler on the entire part, this is done to fill the remaining holes, and smaller cracks if any. Do apply multiple coats as needed. Do not worry much about un even surface as you will be sanding it again.
Use thin metal plate for doing this and apply from bottom to top, this gives better grip and it is applied evenly. Try to put it as smoothly as possible. Use only the fiberglass recommend body filler.
7. Sanding again to make it smooth
Let the body filler dry before you start with this step. Use 80 grit sander paper to make it smooth again. Apply the grinder machine everywhere on the working surface and get the extra filler removed after it is done.
8. Fill any holes with more filler
Once you are done with the sanding part, check if there are still any cracks or holes left. Continue the above steps one more time if you feel so else move with the next step.
9. Apply tapes to protect adjacent surfaces
You can apply tapes either at the very beginning or after filler sanding is done. This is done so as to keep the other surfaces from getting affected by primer and paint which are the next steps in the job.
10. Apply primer
Use suitable device to apply the primer evenly and cover all the affected area. Apply multiple layers. Also, before you do this make sure the surface was cleaned as sanding will cause power to spread on the worked area. Use dry soft cloth to clear that if needed before going ahead with the primer application.
11. Do the final paint job
Apply paint to make it look as good as it was before the damaged was caused. Make sure you are choosing the same color and shade that was originally used else the work will not look good.
Painting the exterior of camper shell in itself can be big job. So, if the work to be done is bigger then make sure you learn the painting art first because its not same as painting a house.
Know this before repairing
Most RV insurances do not cover delamination of the fiberglass which starts as small cracks, holes on fiberglass. Therefore, its always advised to fix the broken fiberglass damage at the earliest. Delamination can also result in when there is internal damage due to moisture trapping and bubbles, such damage may not be visible easily unless inspected.
Though, from the steps that we disused how to fix the exterior fiberglass, it may not be that easy and you may end up making many errors. Such errors can result in repeated issues and also delamination of the fiberglass. Check here all the errors you need to avoid while fixing the broken fiberglass.
Before you start the repair know that such repair will need at least a days time. Identifying, fixing all the damage can take a few hours but you also need to consider drying time. You need to allow sufficient time to dry as you work with the patch work. Priming, painting also needs sufficient time to dry.