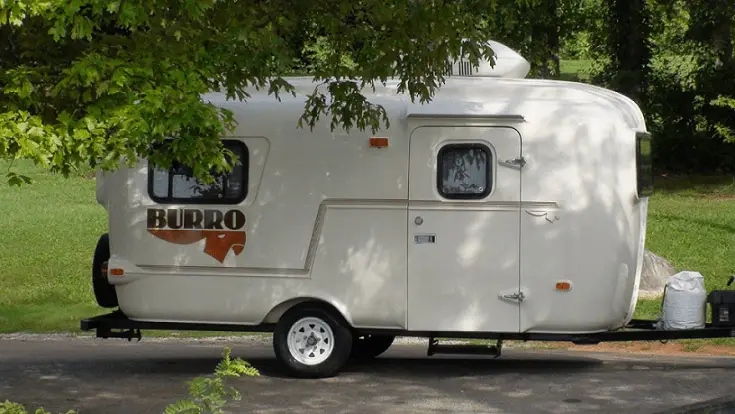
Is your camper’s paint fading or peeling off? Well, this is a problem for many RV and camper owners. There are usually two ways in which you can restore the original vigor; painting and vinyl wrapping. So, yes, you can paint a fiberglass camper.
Like any other material on camper, fiberglass can fade and may need repainting over time. Painting a fiberglass camper is doable but you need to prepare the camper in right manner before painting. Also, choose paints containing acrylic, epoxy, polyurethane, or polyester. Paints containing melamine or oil should be avoided.
Before you can paint the fiberglass camper, ensure any interior or exterior damages are fixed first. If you do not intend to fix exterior dents, a professional vinyl wrap job will look better than just a layer of paint. The vinyl wrap adds new color and conceals the marks.
How to paint a fiberglass camper
Giving that camper a new coat requires some preparations. Forfeiting the prep step could lead to a poor final finish, or the paint could start coming off in a short period.
Preparing the surface for painting
Start by cleaning off all the dust and dirt from the exterior surface. You need soap, water and an automotive sponge for this job. After scrubbing, rinse with plain water and wipe off excess moisture with a microfiber towel.
The roof usually takes more time to clean since it’s never cleaned regularly, and the dirt settles on the flat surface. Refer to our RV roof cleaning guide to clean the roof in the best possible way.
1. Sand with a wet sandpaper
The clean surface probably has minor dents. More so, the paint needs a rough surface to adhere to. Wet fine-grit sandpaper and fix it on a palm sander.
As you polish, try as much as possible to not overstay one spot, lest you create a depression on that spot.
2. Wipe with alcohol
Dip a cotton cloth in denatured alcohol and wipe off the polished surface. Alcohol, a polar substance, dissolves any remaining grease, along with the loose paint particles.
3. Cover areas you don’t intend to paint
Some parts do not need to be painted. Also, if the camper was previously painted with more than a single color, and you need to retain that style, you probably won’t paint them all in one round.
Use a painter’s tape to wrap the sections you do not intend to paint.
4. Prime the surface
Although people often forego this step, it makes a lot of difference in how long your freshly applied paint lasts. Basically, priming a surface makes the paint stick better.
A primer will also fill out tiny cracks and dents on the surface. This way, the paint spreads evenly, giving a better finish.
A fiberglass surface can be best primed with either latex, polyurethane, or epoxy primer. It’s a good practice to use both paint and primer from the same manufacturer.
A primed surface needs to dry before painting starts. After priming the entire surface, leave it for a few hours to dry. Check the manufacturer’s instructions on how long to wait.
Painting the fiberglass surface
After the primer has dried, inspect the entire surface for any noticeable imperfections. Reapply the primer as needed and wait for it to dry.
Painting requires a well-ventilated or open space. If you prime the RV inside the garage, you might want to open the main door wide or try to do the job outside the next time a new coat is needed. If you choose the latter, ensure you don’t do the job under direct sunlight.
There are two tools to choose from; a paintbrush or a paint gun. Brushes are cheaper but require the most work. Nevertheless, achieving a visually uniform coat is very hard with a brush.
On the other hand, a paint spray gun is easier to use and achieves a near-perfect finish. You only need to know how to use it and have it in the first place.
1. Painting
Start painting the camper from the front side, avoiding dripping the paint as much as possible.
It’s easier to contain drips with a paintbrush than with a paint gun. You need to learn the right spraying distance and the speed you paint with. You should not overstay any one point or spray closer to the surface than on other sections.
The first coat takes not less than 24 hours to dry. After this period, observe the camper to determine if you need a second coat or not. A second coat would also extend the lifespan of the paint, holding all other factors constant.
2. Waxing
This is another thing often foregone when painting, especially at a home garage. Waxing not only provides protection to the newly applied paint but also gives the paint a luster. You’ll need wax designed for fiberglass.
Start by sanding the uneven painted sections with fine-grit sandpaper. This is not an extensive polishing job, so you do not need a sander.
Scoop some wax onto a microfiber towel and polish it onto the painted surface. Make circular motions as you smear the wax to ensure the entire surface is well covered. You could also simplify the job by using a soft foam waking pad. It’ll feel smoother as you polish, and you’ll take lesser time.
Types of paint to use on a fiberglass camper
There’s already a wide variety of fiberglass paints. You can choose from matt, gloss, or high-gloss finish variations.
You should go for a paint that will resist different weather conditions and stay firm on the fiberglass surface. For this, you need to choose a paint containing either acrylic, epoxy, polyurethane, or polyester. Any paint containing melamine or oil should be a no-go zone.
One of the most popular fiberglass paints in the market today is the Interlux. Interlux lasts long, and you may not notice any difference in appearance after 10 years. The paint doesn’t fade. Other high-performance and reliable paints you can choose from include DuPont, Imron, and Awlgrip.
Where to do the camper paint job done?
Up to this moment, you may have been cool with the painting process described; after all, you’ve been doing it right. But have you imagined your trailer with a better paint job than you always do?
Specialized RV repair shops do a great job at restoring the exterior look in an RV. If your RV has an issue, most of these repair shops will handle it for you for a different quote.
Also Read : How to Repair a fiberglass camper
Cost
Painting a camper can be expensive, which is why most owners prefer to do it themselves (DIY).
On average, RV repair shops will charge you anywhere between $1000 and $15000 for a two to four-color paint job on a standard RV.
The cost varies depending on various factors such as size or the RV, location of the repair shop, the experience of the staff, etc.
The average cost of getting an extensive job done is $13,000 due to the work associated with repainting a camper. For instance, if you hire a professional painter, they will be needed to remove the gel coat off, which takes up to 50 hours to complete.
Sanding the surfaces will also take up some time till the surface gets smooth. The next step is applying the primer and waiting for it to dry up, then lastly, painting it. All that work will require you to dig deeper into your pockets.
Tips to achieving the best DIY fiberglass paint job
Remember to always do even the seemingly unnecessary stuff, that is…
1. Sand the surface
Smoothening the surface is one way for a perfect paint job as it removes the old paint and leaves a clear surface to work on. That ensures that there will be lesser inconsistencies with the paint.
2. Apply primer
Primer is used on hard-to-paint surfaces. Using the correct type of paint is essential as well based on the surface that is being painted.
3. Use quality painting tools
You will need the best rollers and paintbrushes for that professional look.
4. Apply multiple coats
One coat of paint looks thin, which, trust me, isn’t attractive to the eyes, especially if it covers the old paint. A second coat is needed so that you end up with a beautiful look.
5. Give sufficient drying time
Enough drying time is critical. The primer needs several coats that should be given sufficient drying time between applications. After the whole painting is done, the camper will need several days to completely dry.
Tips on decreasing the cost of painting
Hiring a professional painter might save you some cost since they have knowledge of what is best without compromising the quality and the quantity of what will be needed for the painting.
Have any damages both in the interior and exterior of the camper repaired. Repairing the damage help reduce the amount of paint that will be used.
You can upgrade the campers’ look by using vinyl pieces or pinstriping them. This will give the campervan a whole new look and save you on some cash.
Do away with forgo graphics as they are costly
Using multiple colors is another way to save on the painting costs. Multiple colors use less paint and not to mention increasing your campers’ appearance.
Wrapping It up
Painting a fiberglass camper isn’t a big deal. In fact, most of the work is just like repainting your kitchen cabinets, but this time on a larger scale. The steps and the tips to achieving a clean job are very similar. If you don’t have the time or the tools for doing the job yourself, you can outsource the services. Depending on the magnitude of the job, it could cost you as little as $500.
Enjoy your refreshed camper!


