Holding tank sensor not working is a common problem many RVers face. How many times have you not seen the sensors reading the tank as full immediately after you actually dumped it?
This happens to many of us especially when you just don’t take enough care of the tank and its sensors.
The sensors inside the black water tank are always surrounded by things that can stick to them and get accumulated.
This leads to their malfunctioning or not reading the levels at all. It is just few steps that you need to follow, to make sure the sensors work properly.
Reasons why the Holding Tank sensors don’t work
There can be two possibilities and based on this you need to proceed.
1. They are no longer functioning and gone bad. And you will need to replace them. Any form of repairing or cleaning wouldn’t work on them. The sensors would ideally come with some guaranty, till which they should work but after certain time they would go out of functioning and thus, you should consider replacing them.
2. A sensor may not work properly if there are debris on them. If it hasn’t been long since the sensors were installed then there is a great chance that the sensors need some cleaning. And thus, the sensors are not able to identify the correct level. Even when the tank is empty it would read as if its full.
Before we see the methods to clean the blank tank sensor in camper, its worth it to know what can cause it to malfunction. This will help in preventing the malfunctioning of sensors.
Holding tanks are meant to collect all sorts of things like below:
- Bathroom sink water
- Kitchen sink water
- Shower Or bathtub drained water
- Washing machine rinsed water
- Dishwasher rinsed water
- Toilet flushed output
Black tank is the one that collects the drain down flushed from the toilet and gray tank collects all other things listed above.
So, what can this water include? Obviously some minute particles of clothes, food or soap or dirt. Sometimes little bigger, hard particles can pass through and may not dissolve easily.
Over period this can also result in clogging the black tank.
1. No Signal By sensor
Long time deposition can result in gumming on the sensors as well which may result in not completing the circuit that results in lighting the sensors.
Also, when you use cheap or lower quality toilet paper or those that aren’t suited for fast dissolving, it can remain in the tank and stick to the sensor. This will also result in malfunctioning of sensors.
In case you need to know, how does these sensors inside the tank work?
The electrical circuit is used to turn on the lights on the panel. The sensors are small metal parts that are fixed on the side walls of the tank. When the water levels rise to the sensor, it completes the circuit resulting in turning ON the lights. The sensors are placed at different levels to indicate those levels.
So, whenever the sensor is covered with debris it may not complete the circuit resulting in no indication.
2. False Signal or Misreading
The other case could be wrong signal by sensor. In this case, the the sensor would wrongly turn on the indicator lights even though the water hasn’t reached to that level.
This can happen when the particles or debris clung to the sensor when the RV is moving or some debris can remained glued to the sensor even when you drained the tank. This can result in falsely completing the circuit resulting in turning on the lights.
So, how do you get rid of such situations?
- Drain the tanks thoroughly and regularly. Driving the RV with half filled fresh water after you have drained it completely can give it a good shake to clear it further.
- Using toilet paper that is specially made for RV can help in dissolving it much faster. Many of us are used to home toilet paper and that may not be great for your camper toilet. So, next time when you plan a trip make this a point to get special toilet paper instead of the same home one you get in Costco.
- Even using a RV toilet wand can do the trick. It connects to the hose and has to be dipped inside the black tank via the toilet.
Holding tanks in RV are very important for campers, they come in various sizes.
Apart from cleaning the tanks, its also important that you know exact size of your rv tank. So, do you know how much is the average size of your rv holding tank? Here is an article that took a look at various sizes of rv tanks.
Method 1 : Using ready made sensor cleaner
Black water tank sensor cleaning can be done using ready made products designed specifically for that. Here is one such nice product Unique RV Sensor Cleaner – 32 oz available on amazon, do check it out.
Trying home made things with any self decided chemicals can at times be harmful for the sensors and that can damage them permanently.

At times, when you don’t know what can work and what not, trying such can be wise decision. Use sensor cleaner to clean the sensors by following below steps,
1. First step you need to follow is empty the tank. Once it is empty shut off the black water tank valve. Later fill the tank with water till it touches the sensors. Make sure you have this water at proper levels that it touches the sensors probes else it may not work.
2. Then take the sensor cleaner product and it could be good if you shake it a bit as per the procedure on most of the cleaner products.
3. Put good amount of sensor cleaner inside the toilet. Use the amount as specified by the product.
4. Keep the cleaner inside the tank for good amount of time. A good 10-15 hours may be needed for proper cleaning. However, it is better that you follow the product manual and check the amount of time it specifies. Ideally, the more time you allow for it to do the job, better it will be. The debris on sensors may not be easily washable and it will take some time to clean it up.
5. It can help if the there is some shaking in tank. Just like how you would do to clean a bottle or any other vessel. For this, if you can move the rv for some time, may be back and forth. This will help in breaking the debris much better.
6. You can repeat the process multiple times if the sensors still don’t seem to be free of accumulated debris. After trying this steps, the black water tanks sensors should be working fine.
7. If the sensors didn’t work even after following these steps then the sensors may have stopped working and will definitely need replacement. Mostly the sensors should work if they haven’t been there for lots of months.
Method 2 : Using dishwashing detergent
Cleaning the rv black water tank sensor is very necessary, at least once in a year you should do it.

Else, this can become a mess very quickly. The build up may start and your may have to replace the sensors completely.
Using ready made products work for some but some people are happy trying their own procedure using available detergents.
Remember at times, this methods may not work but i have used it in past and it seems to work well.
Follow below steps to clean the water tank sensor. You can also use this method to clean the grey water tank.
Just to be clear a grey water tank holds the water from the shower and sink where as the black water tank in rv holds the toilet waste. This method can be used to clean both the sensors.
1. The first step is to drain the water from the black and the grey water tanks.
2. Next turn off the black and grey water tanks valves.
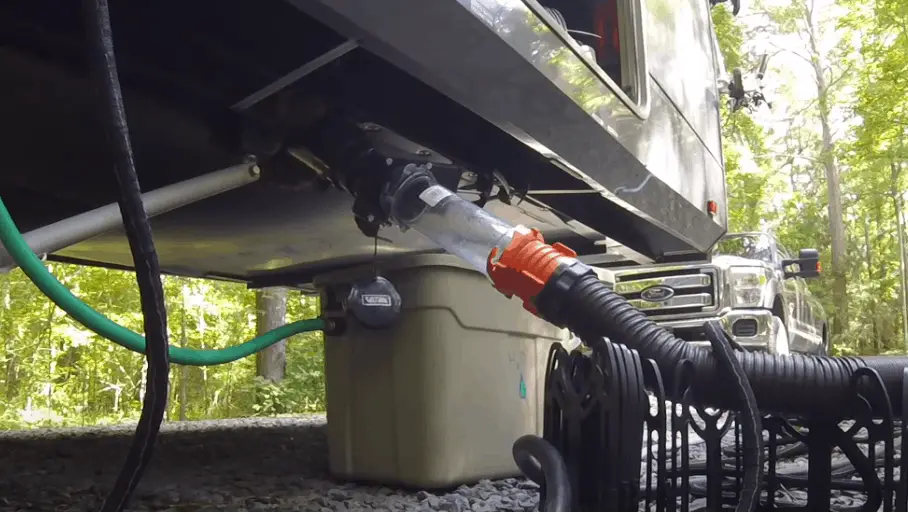
– Attach the sewer hose to the outlet of the black water tank and the other end in the dump.
– Similarly, do for the grey water tank too. Drain the grey water tank using the sewer hose by connecting it to the adapter of the grey tank.
3. Next step is to fill both the tanks at a time with some fresh water. Make sure the water is filled much above the sensors, it should be full better then half.
4. Add half a cup of dishwashing detergent to both the tanks on top of water that you already added. So, for this add it through the toilet and the sink.
5. Next is to make sure the rinsing is done. For this, flush the toilet with some good water and add some gallons of water through the sink. This should clean both the tanks thoroughly. But, do not drain the tanks yet. Keep it for some hours so that cleaning takes properly. Also, the rinsing has to take place.
6. Next is to take round of rv for it to rinse properly and the sensors are cleaned thoroughly.
7. Once you are done taking a round of rv, next step is to drain out all the water from both the tanks. Repeat same steps that you did initially. Connect the sewer hose to the tank adapters and dump it thoroughly. This process should clean the tank sensors and they should start working properly. Doing this activity at-least once in a year should keep them working and you don’t have to worry about misreading.
Method 3 : GEO method to clean black water tank sensor
This is an old method used by many rver since many years. And seems to be working well in cleaning the sensors.

The original method was to use chlorine, but that seems to be causing issue with the valves and hence the best way to implement this method is by using a combination of calgon water softener and dawn dishwashing detergent. Follow below steps to implement this method of cleaning black water tank sensor in your RV.
1. First step is the same that we follow for other methods of cleaning. Drain the black water tank by connecting the sewer hose to the dump and the adapter of the back water tank.
2. Once the tanks is fully drained add one cup each of calgon Water Softener and the Dawn Dishwashing Detergent. The mixture should work well for your sensors and it will remove all the dirt and debris from it.
3. leave the mixture in the tank for some time till it settles down and starts working.
4. Some people also add ice cubes in the mixture, this can work to clean and brighten the surfaces of the walls of the tank.
5. Finally make sure you drive the rv for some time. This will work as a rinsing for the tank with all the mixture.
6. Later, drain and dump all the water from the tanks. This should clean the sensors of the black water tank. The mixture works on reducing the surface tension and prevents from further deposition of minerals on the sensors.
Routine treatment for holding tanks
Even though we have listed out so many options, they may not work for all. A lot of RVers do not try these fancy methods and depend mostly on a proper routine for draining the holding tanks.
Here are some techniques or should I say best practices to follow, that will reduce the mineral or calcium deposits on the tank sensors.
- Make sure you empty the holding tanks as soon as its about to fill. Later, give thorough flush and may be drive a little bit with fresh water filled half way down.
- Make sure the tanks are thoroughly flushed after every RV trip. Do same before you start the camping trip.
- Flush a smell reducing chemical product through the tanks after you ae done draining it.
- Do not connect the tanks to sewer when you are still using the RV. This may turn out to be an ugly adventure. The best way is to allow the tanks to fill almost fully and then dump it.
The best way to keep RV holding tank sensor properly working is by emptying and flushing tanks regularly after every camping trip. Homemade techniques like flushing dishwashing detergent, ice cubes, chlorine bleach or using RV tank sensor cleaners are to be used when the sensors are malfunctioning.
Why you may not need the sensors anymore?
Depending on tank sensor signal to empty it, is for new RVers. You would be still figuring it out. I am sure many of you who are experienced RVers already know a lot about your RV tanks.
Like, for example for us, we hardly depend on the sensors and that is because we know when our gray tank will be full. We know that we have to empty our black tank in around a week. That is our routine, so once you RV enough, you get to know these things.
As a new RVer you would definitely need the sensors to tell you exactly when to go to the dumping station. Even when you aren’t Rving often you are dependent on the sensors.
Where can you dump RV holding tanks?
Dumping the waste water from RV holding tanks anywhere on the ground may not be allowed by law. These rules are however not same across all states in the US.
The best way to empty the holding tanks is to go to the nearest dumping station and drain them at a small fee. Most campgrounds have their own dumping stations, fees for which are included in your overall cost.
Time to replace the RV black tanks sensors
Tried everything and still cant get it working? If that is the case then it is probably time to replace the sensors.
Although, I have never tried it myself, one can follow the steps and replace the sensors in less than 30 minutes. Don’t want to dirty your hands? Sure, you can always take your RV to a RV repair shop and get it replaced.
For flushing RV tanks too you can visit professional RV tank cleaners.
We already saw one of the best RV tank sensor cleaners (Unique Sensor Cleaner) in our first step or you can try the other best option, Caravan RV sensor and tank cleaner.

In Conclusion
Having properly functioning holding tank sensor help in emptying the tanks on time which ultimately will keep the whole system clean. No matter what method you use to clean the sensors don’t forget to flush the tanks on time.