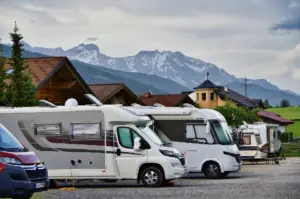
Travel trailer sales are steadily on the rise, thanks to their cost and features that almost make them as on-road home. They are a great way to get yourself a home away from home. With RVs, you could avoid populated areas such as airports and hotels while you travel.
However, we can all agree that travel trailers aren’t similar to regular houses.
There are some common problems that RVers experience that are universal, and, luckily, we have some easy to implement solutions for you.
Common problems that RVers face- and their solutions!
Problems with travel trailer often happen because of two reasons; neglect or wear and tear. More often, failing to do maintenance on your travel trailer could lead to more problems. What are some of these common problems, and how do you go about solving them?
Roof leak
When dealing with travel trailer problems, water leaks are almost inevitable.
Even the best RVs made with the most rigid materials eventually cave to the elements.
The sealants may dry and crack as they age, however great their design is.
Water leaks can cause severe damages to your RVs, and the best way to avoid issues such as stains, electrical damage, and even dust is by minimizing the chances of your travel trailer developing them in the first place.
Prevention
The best preventative measure you’ll need to take is ensuring that you store your travel trailer in an indoor storage facility or a storage area with a roof.
If you can’t find a safe place to store your RV, you could look for a high-quality cover that could help protect it from the elements, most importantly rainfall.
When you are out shopping for a cover, you’ll need to look for one that’s UV-resistant and waterproof. The covers may be expensive, but it would be good to consider a one-time cost instead of renting out a costly indoor parking space to park your travel trailer.
- You could also apply a roof sealant on your RV annually to prevent broken seals that may allow water to leak in.
- Take your time and inspect your travel trailer for water leaks after each trip by looking for stains along every seam and seal.
- Pay extra attention to areas with roof openings like your travel trailer’s air conditioner, plus the kitchen and bathroom fans.
Solution
If your roof is leaking or has taken lots of damage, you could try repairing it yourself; however, I would recommend that you engage the services of a trained professional if you are not a DIY kind of person.
However, if your roof isn’t too damaged, you could continue to protect it by applying a sealant to your travel trailer’s seams and cleaning it as often as possible.
If your roof sustains lots of damage while you are on the road, you could use some aluminum foil to cover the damages and tape it down with tape screws till you acquire professional roof repair services.
Broken water pump or water line
Issues with broken water lines or pumps often happen during the winter. Most campers often use their travel trailers in the summer and put them in storage during the winter.
The issue arises when the water in your camper’s line or pump freezes and ultimately bursts your line.
Prevention
If you want to prevent this from happening in the future, it would be good to ensure that you drain all the water from the water line and pump before putting your trailer in storage.
Doing this will prevent the water from freezing over in the winter, and thus you’d have avoided the problem in the first place.
Solution
If your RV’s pump or water line is already broken, here are a few steps you’ll need to take to fix it.
- First, you’ll have to ensure that you’ve turned the water supply off before checking to see whether there are any leaks throughout your entire travel trailer. You’ll need to check all places, including the cabinets and faucets.
- Find the leaking area in the waterline. You’ll have to cut the line in two, separating the location that leaks, before joining the two parts together with a new waterline using a compression union fitting. Tighten it with a wrench and turn RV’s water pump on.
How to flush your travel trailer’s water system
- You’ll need to take your clean water hose, hook it to your garden tap, and connect the other end to a clean water intake connection.
- Next, you’ll have to open your RV’s grey tank and turn on all the Travel trailer’s faucets.
- You’ll then go ahead and flush the water in your travel trailer until it runs and tastes clean.
- You’ll then go ahead and repeat all the steps listed above on your holding tank.
Electrical issues
If there’s one thing, most people are often afraid of handling electrical issues. With DIY electrical repairs, you risk damaging your travel trailer and even putting yourself or someone close to you in harm’s way.
However, there are some travel trailer electrical problems that most people could take care of.
For instance, you could encounter broken push buttons or switches.
You can rectify such problems fairly quickly since replacing the broken parts is a relatively small, straightforward procedure. This is quite common for damaged outlets in your travel trailer.
More often, you’ll find your travel trailer’s outlets malfunctioning.
This commonly happens when the clip-together receptacle used by manufacturers stops functioning correctly. The receptacle used in the travel trailers often cut through wire insulations to make contact and transfer electricity. What do you do when they become loose?
Solution
If the receptacles become loose, then you could go ahead and replace them with similar outlets used at home.
- Using a more reliable power outlet is one easy way to solve such minor electrical issues.
- Inspecting your travel trailer’s electrical system regularly could help prevent any significant problems that may result from minor cumulated issues.
The best time to inspect your travel trailer is when you plan to go out on a trip.
It would be good to check whether any connection points are stressing the battery, following the power lines and studying whether every appliance powers up correctly, and testing your travel trailers fuse.
Battery failure
If your travel trailer fails to start and its lights fail to turn on, then there is a chance that your battery may be failing.
A failed battery, if not detected early enough, could leave you stranded in some remote location miles away from any help.
What can you do to avoid such a situation?
Prevention
- The best preventative measure you could take would be to ensure that your travel trailer’s battery cables are disconnected at all times. Doing this will prevent the appliances from drawing power from the battery even when you aren’t using them.
- It would also be great to check your battery’s fluid levels regularly and ensure that you fill them with distilled water as needed. You could also invest in sealed maintenance-free batteries that require less attention.
Solution
The best solution in such a situation would be to find a way to charge your travel trailer’s batteries.
If you happen to be in a campground, you could plug into an AC power supply that will charge your battery; however, if the battery keeps discharging, then it’s about time that you looked for a new battery.
Broken RV toilet
Few things can turn your camping experience into a nightmare, and one thing that you never want to leave to chance is your RV toilet and subsequent plumbing.
It doesn’t help matters knowing how much your toilet goes through while driving.
Constant bumps and left-right motions increase the chances of your bathroom being damaged.
You may experience common problems with your travel trailer toilet, like water not staying in the toilet and getting an inconsistent water flow.
The issues may seem minor; however, neglecting them could lead to water damages and more problems with your water supply.
Prevention
The best preventative measure would be ensuring that you keep your travel trailer maintained at all times and right before you go for a trip.
While this helps in a general sense, there are times when bad luck hits and your toilet fails on you right in the middle of your camping trip.
How do you repair a broken toilet?
Solution
To repair your toilet, you’ll need to turn off the water pressure and flush your toilet.
Next, you’ll need to open the bolts that secure the toilet to the floor and lift it away from the wall. Inspect the toilet and order the parts that need replacement.
Pour some water into the toilets to ensure that the seals hold and apply pressure to the water line to ensure that the valves don’t leak.
You’ll then need to install a new rubber seal between the travel trailer and the floor. You’ll then need to bolt the toilet to the floor.
Preparation Toilet seal
The toilet seal tends to cause leaks when it hardens or dries out. Replacing it beforehand could help prevent water damage.
Holding tank sensor malfunctioning
Holding tank sensors are pretty sensitive and can detect residue leading to inaccurate results. Dropping ice cubes into your toilet could help remove any objects that may be lodged in the tank.
Tank treatment
Ensure that you treat your tank regularly will help break down waste allowing for a cleaner rinse whenever you pump out your tank.
- Keep your toilet bowl clean.
Keeping a plastic cup that you could use to pour some water around the toilet after flushing could help keep your toilet bowl clean.
- Toilet paper
It would help if you used travel trailer-friendly toilet paper that goes down quickly and dissolves in the holding tank to minimize clogging.
RV tire blowouts
Travel trailer tire blowouts are common; however, they are more problematic if they happen in the worst places, i.e., when you are deep in the mountains.
However, if you have some spare tires, you could go ahead and fix them whenever you have a blowout.
Solution
You’ll need to pull away to a spot where there’s minimum traffic. Set the parking brake and ensure that your travel trailer is hooked to the towing vehicle. Block the tire opposite to the tire you’re changing.
- Remove the cover and use a lug wrench to break the nuts loose. Jack up the camper by placing the jack on the frame rail behind the tire you want to change.
- Unscrew the top of the jack to get some additional height. You could also use some leveling blocks to get some extra height, then work the jack.
- Ensure that the wheel is spinning and work out the lug nuts. Remove the tire and replace it with the spare tire after checking the pressure on all tires.
Place all lug nuts and tighten the pairs that face each other, ensuring that they remain balanced. Lower the jack and tighten the lug nuts.
Prevention
- Ensure that the tires are properly inflated.
- Ensure that you inspect the tires for wear and tear before any trip.
- Avoid overloading your trailer.
- Use tire covers when storing your travel trailer.
Repairing your HVAC system
Your HVAC isn’t a luxury; it’s a necessity. If you come back to your trailer after hiking and find out that your HVAC isn’t working, there are some troubleshooting tips you could use to diagnose and make repairs.
Solution
- If your HVAC system functions appropriately, but the air isn’t cool enough, it means that the travel trailer’s air vent filters have malfunctioned. Replacing the dirty filters could leave your travel trailer feeling cool in no time. Ideally, these filters should be replaced regularly and right before you go out on a trip.
- Sometimes, the problem may not be your RV’s AC unit. You could be experiencing issues with your thermostat. Replacing your thermostat is relatively simple, and you’ll get the chance to upgrade from an analog to a digital variant.
- To determine if your analog thermostat is acting up, you could pop it open and jump the two copper plates. If the HVAC system comes on, then you’ll need to replace your thermostat.
- If you have a digital thermostat, then you could begin by checking the fuse. Pop the fuse open and inspect the voltage with a voltmeter. Ensure that the two sides of the fuse have similar and adequate voltage.
- Your RV may be messed entirely up, forcing you to replace the entire thing altogether.
Conclusion
The best solution to travel trailer problems is prevention. You could do this by ensuring that you store your travel trailer correctly and that you have it regularly maintained. Ensure that you replace all faulty parts, especially before you go on camping trips. Have fun camping!