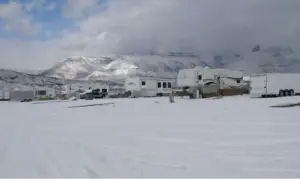
Just as winterizing your travel trailer or motorhome is imperative to help the trailer withstand the cold climate so is dewinterizing after winters are gone.
This is imperative for the proper functioning of the RV or travel trailer. The process of dewinterizing the RV is simple but entails a lot of steps. So, before you get the RV on road for exciting summer season follow all these steps to get it fully prepared.
When we unwinterizing the RV we basically reverse all the steps of winterizing to get your RV ready for another amazing camping season. Lets go through steps you need to perform for de winterizing a RV or travel trailer.
Check exterior of the RV for any damage
The most crucial thing is to examine the exterior of your travel trailer first. Remove any covers from the RV and wash the it thoroughly to get rid of all the dirt and debris from the outside of the camper.
Use a mild soap or detergent to clean the RV. Remove any mildew and stains that may have developed. Clean the awnings as well and ensure they are intact and operating properly.
Inspect the windows and ceiling panels for any damages. Make sure the sealant is in a good condition and has not dried out or cracked.
Pay particular attention to the roof. Heavy snow accumulation can damage the roof. In case you have a towable trailer check the hitch components for rust and damage. Damaged parts should be replaced to avoid getting stuck on the road with a broken hitch.
Check RV lights and signals. Make sure they are working fine.
Clean the interior and check appliances
While in storage for so many months, you will probably find spider webs, dust, and other debris inside your RV. So give your RV or travel ttrailer a thorough clean on the inside as well.
Clean every nook and cranny of your RV including water heater, refrigerator, and its compartment drawers.
Check the RV interior carefully for rodents and bugs. Make sure all the electrical devices and appliances are working properly.
Clean the oven, stove top, and cabinets. Dry out the freezer completely. Air out your RV by opening the windows. Clean all the hard surfaces thoroughly with bleach and all soft furnishings with fabric sanitizer.
Flush the water system
It is important to inspect the water system when dewinterizing the RV. If you had used anti-freeze to prevent the water system from freezing, it is important to get rid of that first. This is imperative so that the water is clean and safe to drink.
Flush the antifreeze by letting the water drain out completely and properly examine all the faucets and valves for leaks by letting the water flow.
If any leaks are found, then repair it. Also, if you have a water heater check if it is functioning properly by opening the valves of hot and cold water.
Run fresh water through the complete plumbing system, including toilet, outside shower, ice maker, and even washing machine, if you have one.
Once all the antifreeze is removed from the plumbing system or pipes it will be collected in the gray and black water holding tanks. These tanks need to be emptied into a proper waste disposal site. Always check the waste tank to ensure smooth functioning.
Using RV antifreeze is a very common way before putting RV for storage. There are lots of questions that newbies have regarding antifreeze. For the same reason i had written this article on RV antifreez. Please check it out to get all your questions answered.
Check RV batteries and recharge if needed
If you had removed your batteries during the winter, make sure they are back again. In cold weather, RV batteries discharge at the rate of approximately 10% when stored. So, most likely you will have to recharge your batteries.
But, first check them for any wear and tear. Turn off the power connection completely and always wear a protective gear when working with the batteries.
If you find the terminals of your batteries oxidized then clean them. If you find any cracks on your battery replace them as they can’t be repaired.
It is a good idea to replace all the batteries, if you are replacing one. Now charge the batteries and check their fluid for the right level. Top up with some water if the fluid level is low. Now reconnect the batteries, making sure the terminals are hooked up correctly.
Make sure propane system is working fine
When you are checking the propane system, ensure all the appliances that run on LP are turned off. Open the valves of the propane system and check for any leaks.
Remember not to smoke while checking your propane system for any cracks and leaks. Leaks can be checked by taking soapy water close to the valves. If the water starts making bubbles, then that means your propane system needs repairing.
Leaks can also be detected by switching on the leak detectors in the trailer. If you smell any leaks turn off the valves and air out your RV and take professional assistance.
If all the gas lines are in good condition, open the valves slowly to restore the gas back to the propane system. Make sure all the gas-powered appliances like cook tops, stoves, and refrigerator are functioning correctly by opening the gas line and testing each appliance.
Sanitize the RV
Sanitize your RV properly with bleach or any product available to disinfect the camper. Sanitizing your RV or travel trailer is important to get rid of any mold or bacteria that could have grown during the winter months in storage. Unlike summer or spring winter is more harsh on your costly RVs. So make no mistake before getting the RV back on road after winter storage.
The steps to sanitize your RV water system are given here under.:
- First close all the drains and valves.
- Take one-quarter cup of common household bleach for every 15 gallons of fresh water in your tank.
- Mix bleach and water and pour this mixture into the fresh water tank fill.
- Now fill the fresh water tank completely with potable water.
- Pump the water through all the water fixtures and lines and allow the bleach solution to sit for no longer than 12 hours. Leaving the bleach in your water lines for a long time can cause the synthetic seals to get damaged more quickly.
- Drain the water system completely until the water stops smelling and tasting like bleach.
- Repeat this process to remove all traces of bleach.
Make sure RV tires are in good condition
After having been stored for months, the air pressure in the tires also decreases or the tires may go completely flat also. Therefore, before you head out on the road it is important to ensure there is an optimum air pressure in the tires of your RV.
Check the air in all the tires of your RV using a tire pressure gauge, including the spare tire.
Also, check the condition of your trailer’s or RVs tires. Check the depth of the tread on the tires with a tread depth gauge by inserting it between the treads and get a reading.
One more important thing to check in your tires cracks on the sidewalls or at the base of the treads on the tires. If these cracks are deep, they can cause the tire to blow out sometime when the trailer is out on the road. Usually this happens with old tires but still you need to be cautious and check your tires for any cracks.
Check or change Air and water filters
If you use air or water filter then make sure you get them replaced for coming season. In most cases you will need to replace them or at most get them checked.
Many filters may need replacement as it will be in storage for so many weeks. This is to make sure you aren’t using a faulty one for you next camping trip.
Check on water pump
Although in most cases most of your electrical appliances will work just fine, it’s imperative to check all of them. Water pump is another important one in your list.
Shut the outside supply and check the water pump. Run it to see if it pumps the water fine or not. Listen carefully for any signs of noise it may make.
After staying idle without usage it may develop issues which can generate noise. So run it multiple times to identify any such malfunctioning.
Repair roof for any cracks or damage
An RV roof is one of those things people neglect. When in storage RV roof may develop cracks and it’s important to check it in time. Depending on how the RV was stored the roof may get a hit even while in storage.
RV roofs can be made up of different materials like fiberglass, aluminum, or rubber. Not storing the RV properly will effect the roof specially when the weather isn’t that great.
Climb up on the roof and observe closely for any signs of crack or damages that may need fixing. Look especially at areas that were repaired previously. Check at edges gaps near air conditioners, vents. While on the roof make sure you are careful, a roof can handle a weight upto certain limit so just be careful.
Check on other appliances
Appliances like a refrigerator, air conditioner if not in use for an extended period of time may take time to function again. So, make sure you start them as soon as you start preparing to get your RV on the road again.
Clean the refrigerator as it may develop odor and dirt due to existing food items. Ideally you should clean it thoroughly and not keep anything inside while string it.
Conclusion
Whether you own a small pop up camper or a big class C or class A RV its just necessary to follow these un-winterizing steps before getting the RV back on road.
To enjoy your spring or summer camping season make sure you prepare your RV just the right way. Enjoy your RV camping !