Things rolling off the counter, fridge malfunction, discomfort in sleeping, bouncing and swaying of an RV are some of the side effects of an unleveled RV. If you love camping out, then you may have experienced parking on uneven ground or an unleveled area.
So, how do you make your RV level enough to ward off the problems mentioned above? There are lots of ways to level an RV – using manual leveling jacks, hydraulic leveling system, RV leveling blocks, or ramps.
A manual jack cannot support the weight of your RV for a long time and may cause accidents. You may end up breaking up not only your jack but also the RV frame. Hydraulic leveling jacks can save you the trouble of manually setting them up. Leveling blocks and ramps can also help level your RV. You have to decide which one works for you!
Need to level an RV or Travel trailer
The most important reason for leveling your RV is that an unleveled RV can impair the structure of the trailer and possibly cause damage to the undercarriage.
Your tires can wear out soon. There could be unnecessary stress on the door and window frames, plumbing, cupboards, etc. Your refrigerator and other appliances will not operate correctly and safely if the RV is unleveled.
Leveling your RV can also prevent you and others from losing their balance while walking inside the RV. Leveling an RV is also important for a restful and comfortable sleep and your safety.
What would happen if an RV isn’t leveled?
RV leveling can casue multiple issues in your RV and you wont even have clue about it. A lot of new RVers neglect this important aspect and end up paying the price.
If you are into RVs for years then you exactly know what i am talking about. So, what would happen if you were to simply neglect the leveling? Lets find out.
Damaged refrigerator
Your refrigeration system may go out of whacks and you will wake up to find your food and drinks warm. A gas or propane refrigerator uses ammonia as a coolant, and water and ammonia and hydrogen gas to form a continuous cycle for ammonia.
The liquid ammonia that flows through your refrigerator cannot run uphill and if the RV is uneven the liquid ammonia will collect causing blockage in your refrigerator. This can cause the chemicals to get overheated in one section of the coils.
Your refrigerator may work even in a slanting position for some time but will cease to work in the future. And replacing RV refrigerators can be very expensive.
Unsafe and uncomfortable to sleep on
Apart from being unsafe, it is annoying to sleep in an unlevel RV. Sleeping on a slope or uneven ground can make your back and neck sore. So, be prepared to wake up feeling tired and exhausted, if you had your body at an odd angle all night.
Uneven water tanks
Your RVs are fitted with sensors that indicate water readings. If the tank is uneven then you will get incorrect readings. It is imperative that before you hit the road your tank readings are accurate. This is because once you are on the road you cannot dump or fill your tanks for some time.
Different ways to level your RV?
There are multiple ways you can keep the travel trailer leveled. From traditional ways ot automatic ones,lets go through it one by one.
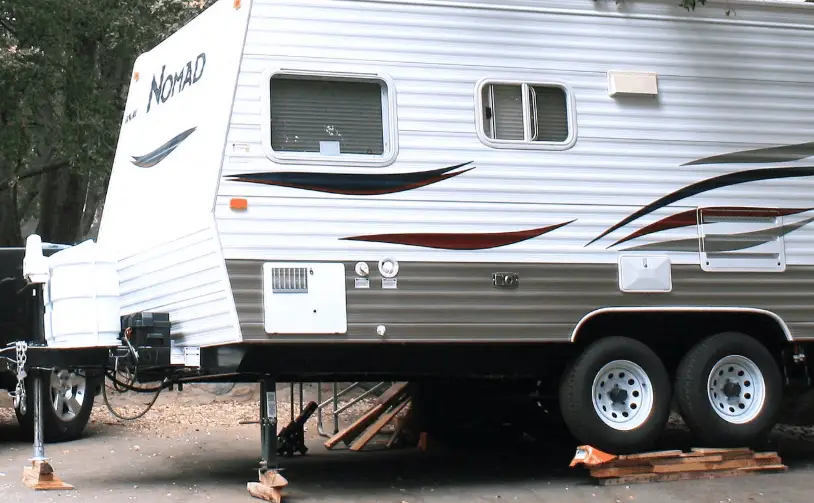
1. RV leveling block system
There are mainly two main types of RV leveling blocks that are used to level your RV- interlocking leveling blocks and the ramp leveling blocks.
Interlocking leveling blocks
Interlocking leveling blocks are plastic blocks quite akin to the lego blocks which are stacked together to the desired height for easy and safe leveling. They can be positioned underneath stabilizers, jacks, and RV wheels to give enough lift to level your rig.
When buying RV leveling blocks you must ensure their durability to avoid any possible accidents both inside and outside your RV in case the leveling blocks fail. Also, your leveling blocks should be able to endure a change in temperatures.
Another thing you need to look into when buying leveling blocks is to know how much weight can they withstand. All leveling blocks cannot tolerate any type of weight.
Ramp leveling blocks
Ramp leveling blocks are a great solution to leveling your RV. You don’t have to stack them on each other. You also don’t have to go back and forth until you reach the right spot.
Ramp leveling blocks save you the hassle of stacking and unstacking the blocks when arriving and leaving. All you have to do is just drive onto the ramp block until you hit the desired height.
2. Hydraulic RV Leveling System
If you have an automatic hydraulic leveling system on your RV then leveling your RV is quick and easy. However, a hydraulic automatic leveling system can be manually employed also. By using hydraulic jacks you can lift the entire trailer or RV off the ground.
This is especially helpful when you have to change the tires. While using the hydraulic levelers one complete side or complete end is lifted to prevent twisting the unit that can damage the structure of your RV.
A hydraulic leveling system should not be used on a soft dirt surface, as the jack can sink into the ground. A concrete surface is best for this type of system but you can also use it on the blacktop with a little caution.
If the surrounding temperatures are too high you will have to create a depression in the blacktop with the weight of your RV on the sample pads of the leveling jacks.
3. Stabilizer jacks
Most of the mid-sized travel trailers come with stabilizer jacks located at the four corners. These jacks are not designed to lift the RV off the ground in case you have to change the tire.
Stabilizer jacks along with wheel chocks are used to make the RV as stable as possible. However, the stabilizer jacks can only eliminate swaying and rocking of the RV after it has been leveled.
Leveling an RV on the slope
When camping outside you need to deal with uneven or soft campsites especially when traveling to remote locations. If you have to level your RV on a slope, then follow the steps given hereunder:
First and foremost, find the evenest place to park with a minimum amount of slope. Now when you have the RV parked in the best position, it’s time to start leveling. Take the blocks and start placing them in front of the tires.
It is important to keep the trailer hitched until you are finished leveling your RV. You can use the interlocking leveling blocks to form a ramp for the RV and put them in front of the wheels you want to raise.
If your RV has dual wheels then you need to place leveling blocks in front of both the wheels. Once you have the leveling blocks in place, slowly drive the RV on to them. You can have somebody guide you so you know when to stop exactly.
You may have to drive back and forth to position the tires directly on top of the blocks. Once the RV is level you can put the chocks on the wheels on both sides of the RV. Wheel chocks are important as when people start moving inside the RV, it can move a little bit. Wheel chocks keep the RV still and in place and you should always use them.
leveling a travel trailer or an RV on a permanent site
If you are looking for parking your RV permanently at a site or for a long period then you need to get it leveled properly. The following steps can help you in leveling your trailer on a permanent site.
- Finding a leveled spot or ground for your trailer is next to impossible. But look for a spot that is close to being level.
- Always keep an RV level whenever you go camping. An RV level will indicate how many inches are needed to raise or lower your RV. Place it next to the RV and see which side is lower that requires to be raised. Now put your leveling blocks in front of the tires of the side that needs to be raised. You can use wood blocks also but you have to make sure they are wider than your tires. Also, woodblocks are cumbersome to carry around and take up a lot of space in the RV and therefore should not be used.
- Now slowly tow your RV on to the leveling blocks. You may need to back up and reset the position of the blocks. The tires need to be fully within the width of the leveling blocks. Now put wheel chocks to keep your RV still. Place the wheel chocks behind the tires if the ground slopes backward and in front of the tires if the ground slopes forward. Now lay down few pieces of planks (2″ x 10″) and start lowering the tongue jack that is located on the front of the RV. This is done to prevent the tongue jack from sinking into the ground.
- When you think that your RV is firmly secured, unhitch the vehicle. Check the level again using the RV level and see if the front and back of the RV need to level. Adjust the level by either raising or lowering the front or the back using the tongue jack of the RV.
- Now lower the stabilizing jacks which most RVs have in the four corners to prevent the RV from moving from side to side and losing its level. Your trailer is now leveled and you can enjoy living in your new living space for a long time.
Level your RV using a hydraulic leveling system
Manual system
Raise the low side first by pushing the button with an “up” lit-up arrow on the side. Level your RV front to the rear by lifting the jacks in the low end of the trailer until the light goes off.
Now it is time to level the sides of the RV. Repeat step one to level the sides.At this stage, you would have used all the four jacks and now all you have to do is to lower the last fifth jack until it touches the ground.In the end, when you are finished, make sure all the jack lights are on and no ” low side” lights are on.
Automatic system
In an automatic leveling system, all the steps of the manual leveling system are followed but now the system does most of the work for you. Push the power button and see if the screen gets turned on.Now push the “auto-level” button to start the process.Once the computer system has completed the leveling process, turn the system off.
Best way to level the RV
Having gone through all the ways you could possibly level the RV, this question will obiviously pop up in your mind (if you are very new to Rving). Whats the best way to level the RV. This is an important point because you may find it difficult to level the RV.
At times the campsite may not give you leveled space itself. Your RV may not get leveled no matter what you try. SO how do you keep leveled fast and easy? Lets find out.
- Try to get a parking space that’s leveled in first place. Uneven ground makes it a lot harder to do this activity. A spot that’s flat makes a lot of difference. If you are dry camping then you will to figure the space that good enough.
- The first thing you do before starting the setup is clean the area and try to make it as flat as possible.I agree its not going to make 180 degree shift but you can give t a try.
- Make sure you place the leveling blocks as aligned as possible and get your RV up there at the center of the blocks.
- Choose the blocks carefully.Not all blocks are same. This point i know should have been the first line but still, get it right. Do not follow others. Every RV or travel trailer is different. This happens with a lot of people, you order the blocks and then you realize it not the one that you were looking for.
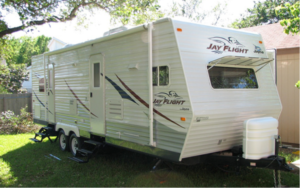
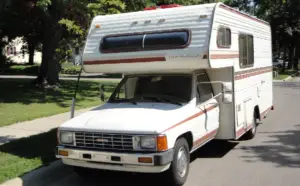
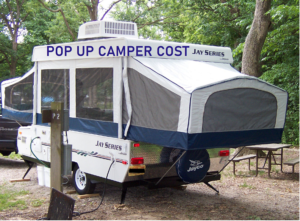
Leveling for different RV types
Some people have this questions : well, i have a class A motorhome, do i need to level it? Well, yes you have to. Its not the type of RV that decides whether you need to level it not. Every RV has to remain flat while parked.
Yes with higher end motorhomes you will get automation, hydraulics and they will be more stable. With lower end travel trailers or pop up campers it going to more manual. Bigger motorhomes are bulky and may need better leveling systems.
Class B motorhome or even class C motorhomes may not have that auto leveling systems and you will have to put in the manual efforts to keep it flat,leveled.
Length of the RV also matters for leveling. A shorter RV is easy to level as compared to larger ones. A fifth wheel lesser than 25 feet may not even need leveling. It all depends on the RV type, length and campsite space.
Should the slides be in or out when leveling an RV?
An RV should always be leveled with the slides in and not out. Once your RV is level, then you can have the slides out or extended. This puts less strain on the leveling and slide-out system. Non-leveled conditions can cause damage to the slide-out mechanism.
Conclusion
Leveling your RV is very important and surprisingly easy once you know how to do it! It may feel intimidating at first, but with more and more camping trips you undertake, leveling the RV will become second nature.