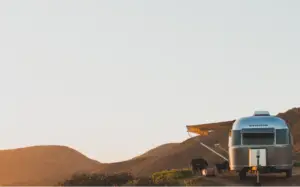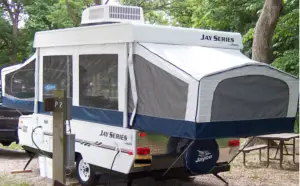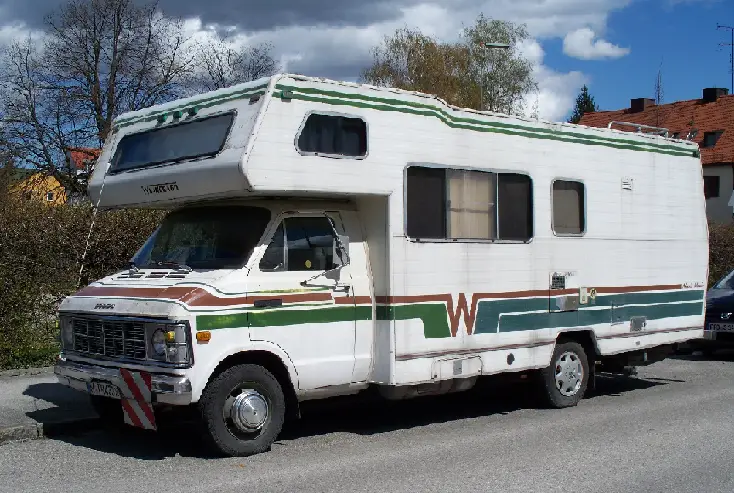
RV camping is fun and adventurous for people who enjoy camping. But, as you prepare for your next camping adventure on an RV, it’s important to know that campers are susceptible to various challenges.
Siding delamination is one of these problems that you should know.
At some point in your camping adventures, you may notice a tiny bulge on the siding of your recreational vehicle. The bulge will gradually grow for several months and result in the destruction on your RV walls if not fixed. If you notice this form of damage on your camper, you may be dealing with delamination.
You should be wary of delamination since it is a symptom that your recreational vehicle needs repair.
In this guide, you’ll learn how to spot, prevent and fix it.
What is Delamination in Camper?
When your camper experiences delamination, its gelcoat or fiberglass outer layer will start pulling away from the plywood or luan (also known as the substrate).
Your RV’s siding will develop small cracks, which spread outward with time. Water intrusion in the siding will likely accelerate the development of the cracks. You’ll find it expensive to repair the entire wall once water penetrates through the substrate lying under the fiberglass.
In past, RV models used to have aluminum as the material of choice for the siding. However, manufacturers opted for fiberglass siding because of its lower overall costs, lightweight properties and durability.
Today, campers feature sidings with interior decorative walls and exterior fiberglass vacuum bonded together to form a durable wall.
Though fiberglass is more flexible and durable than aluminum, the bonding substance between RV walls made of fiberglass is susceptible to water and heat damage.
The damage, known as delamination in this case, can also affect the RV roof. It usually takes the form of a convex air pocket that makes the bonding agent detach from the fiberglass and interior plywood.
Delamination may result in further damage of your travel trailer walls when bubbles that form in the air pocket trap crack and trap moisture in between the walls.
It can occur when water seeps into the walls through a vent seam, window or roof if your camper’s sealant is insufficient or deteriorated. The long term impact of delamination on the siding is wood rot.
What Causes Delamination on a Camper?
One of the main major causes of delamination on a RV is negligence. As a camper owner, it’s your duty to maintain the bonding agents and prevent them from accumulating moisture.
The moisture buildup inside your RV’s walls makes the adhesive less effective. Once the walls lack a strong bonding agent to keep them together, they will peel away from each other and form an ugly bulge.
Water from your bathroom and kitchen areas may trigger delamination on your RV’s siding.
You’ll also notice the bulge in parts of your camper with a sink installed. If one of the pipes running through your walls is leaking, you’re likely to have delaminated walls. Water leaks are common in used RV models.
RV delamination is caused by moisture that penetrates between the outer layer and the substrate resulting in weakening the bonded layers. Stress cracks on the RV body due to flexing can facilitate such water penetration. Therefore, always look out for such cracks and repair from time to time.
Excessive heat in your camper can also result in delamination of the walls. In this case, heat sources such as the heater may weaken the bonding agent in between the walls.
Your camper may also be susceptible to delamination if you’re camping in an area with desert-like temperatures.
How Can You Spot it?
It’s important to know how to spot the signs of delamination whether you’re buying a used RV or you own one made of fiberglass.
The earlier you find these signs, the simpler it will be to fix them and prevent further damage.
Consider walking around the camper (when parked in direct sunlight) and thoroughly inspect the rear, front and side walls. You should also look for abnormalities around the roof vents and windows.
Unless its a very minor issue is always better to avoid RV’s that have delamination because such an RV may also have related issues like water damage, leaks and mold.
Here are other ways to spot delamination in your camper:
Creases, bubbles or waves on the fiberglass
In its undamaged form, fiberglass is usually smooth and flat. If the fiberglass has creases, bubbles or waves that feel spongy when pressed with a finger, it’s a sign of delamination.
Tap it lightly with an object made of plastic (such as a pen) to double check your observations. If the fiberglass produces a hollow sound, it’s still a sign of delamination.
Parking your camper in a shade can help you tell whether it features delaminated sidewalls. If the bubbles and waves inside the walls get flatter and smaller, it’s a possible delamination sign.
The bubbles and waves tend to reduce in size when you park your travel trailer in a shade because the bonding agent holding the walls together shrinks in cool temperatures.
Growth of mold on the inner wood layer
In severe instances, you’ll notice the growth of mold on the inner wood layer once you peel away the outer layer. Mold spores tend to accumulate on damp wood once water penetrates through your camper’s sidewalls.
At this point, the water damage will weaken your RV’s structural design and make it more expensive to repair or replace the affected parts.
Leaks on RV accessories
If you spot leaks on TV accessories mounted or screwed into the sidewalls, they may suggest that delamination occurred. The accessories may include exterior mounting brackets, lights, electrical sockets, awnings, ladders and mirrors.
When this happens, consider removing and reinstalling the affected accessory with new gaskets. You should also properly put the fasteners and screws back in place.
RV insurance companies normally do not cover delamination repair costs as it is considered to be issues resulting from lack of maintenance.
This gives another reason for you to be very careful in identifying for any signs of delamination and take preventive measures or fix it on time.
Repairing the RV delamination
To be honest, fixing or repairing delamination on a camper is not for everyone. Its a structural issue on the walls and fixing it to be as it was earlier may not always happen.
Having said this you can work hard to make it as best as possible but do not expect it to be 100% perfect.
Another important thing to know is, it will take lot of time and patience. How much time you need to spend will depend on the amount of damage.
Before we see the exact steps in fixing, lets address few important questions you may have.
How much will it cost to repair the delamination?
Considering you will have some basic tools to do the repairs, you will end up spending approximately $200 on doing the delamination repairs on the camper.
What all tools and items will be needed to carry out the repairs.?
Your RV delamination repair kit should include all of the below items apart from basic tools that are needed for repairs.
- Epoxy Resin
- Hardener
- Clamps
- Wood pieces for bracing system
- Injector and tube
- Cups for mixing the resin and hardener adhesive
- plastic to cover the affected area
- Paint tape for marking the area to be worked upon
- Gloves
- Other basic tools for making the bracing
What things should you keep in mind before starting the repairs.
Here are the steps in repairing the RV delamination.
1. Step first involves identifying the damage that you want to fix
Remember, you don’t have to fix everything in a single go. If the damage is huge target some spots first. Inspect the walls for exact damage. Looking at it from closer distance may not be great idea as you may not see the damage properly. Inspect from various angles as well as with different light conditions, this will give you proper idea on the damage.
Once you have proper idea on the delamination area go on with next planning.
If the delamination is on slide out make sure you check in thoroughly by expanding and closing the slide.
2. Mark the area with paint tape
Planning is one of the key steps in this whole repair process. And for that, you need to have visible markings so that you don’t mix up the process. Make use of blue paint tape to mark the area to be repaired.
This will help you in setting up the bracing support system which is the next step in this repair process.
3. Create bracing support
This is the most important step as otherwise you will end up creating issues with the whole repair. Use clamps to support and provide strength to the repair you will do.
Make use of wooden pieces and clamps to create the bracing support. Get as many pieces as needed and have this ready before going to the actual repair using epoxy resin and hardener solution.
4. Make injecting tube
You need an injection tube assembly that will be used to inject the resin/hardener solution into the delaminated area. For this, you can use syringe and tube connected together.
Buy number of syringes as you will need new one for new days of work. With resin hardening over time the syringe wont work easily and therefore I suggest getting multiple syringes in first place.
5. Remove all items that block access to the delaminate area
Remove trims, windows or lights that can make it hard for you to access the area or make it difficult to create clamps or bracing system.
This will largely depend on the area of the camper. This means you may have to remover windows or rain gutter and so on. Whatever the case, plan for this beforehand and make it supper easy for you to attach clamps and wooden pieces.
6. Prepare epoxy resin and harder solution
Remember to have everything else ready before going for this step. The mixture will become hard if you make it and keep as it is in the cup.
Therefore, be ready with everything and then go for this step.
The idea is to create a mixture as per recommendation by the resin brand. Mostly it is 1 by 5 wherein 5 quantity of resin and 1 quantity of harder is to be used.
7. Inject the resin and hardener solution into the laminations.
Slowly inject the solution into the delaminated area and once done press hard temporarily before applying the bracing system and clamps to support it. Infecting resin adhesive should be done slightly above the area where you want to fix it. This will help in applying it uniformly as it would run down as you apply.
8. Clamp the region
Once the epoxy resin and hardener is injected make sure you clamp the whole section for good number of hours to around 15-20.
This is a very important step as otherwise the solution will not spread uniformly and hold the lamination properly.
Using hands, support and press the lamination. Then clamp it thoroughly using clamps and wooden pieces as required. Make sure the camper is parked at a proper location because you need to keep it untouched for 10-20 hours or even more.
You need to keep this in mind even before starting the repair.
If the area to be repaired is big then make sure you do this process step by step choosing small portions preferably starting from the bottom up to the top.
Here are some important tips from my experience to make your whole repair process easy and smooth.
- Make sure you start the repair process from bottom to top. If the section of the exterior to be repaired is big then it will take time. Therefore it is always better to target small sections starting from the bottom.
- Prepare the resin and hardener mixture solution in small quantities instead of a whole lot. This is because, the mixture gets hard faster and if you don’t inject and keep it inside the cup it will become hard and stick.
- Cover the section adjacent to the repairs with plastic or other cover to protect it from resin mixture that can stick very easily.
- Give sufficient time for the injected solution to harden.
- Repair results may not be as you wanted but you can always try your best.
- It will need sufficient time which can be days to weeks based on the amount of damage.
- Do a dry run before starting the repair as it involves fixing which is time dependent. This will help you in avoiding mistakes.
- Take help from a family member or friend as some things like creating bracing assembly for support need to be done as quickly as possible.
If you own an RV with delamination and want to sell it then better repair it before selling. RV inspection will easily find it out and you will lose the money.
What to Do to Prevent it?
The good thing about spotting early signs of delamination is that you get a chance to fix them before they result in further damage. You can also prevent these signs from occurring and save big on repair or replacement costs.
The two preventive measures for RV delamination include inspection and early repairs as discussed below:
Regular inspections
Routine care and maintenance should always form part of your inspection procedures if you want to prevent your camper from delamination and keep it in perfect shape. You can carry out the inspections by yourself or rely on expert help.
Either way, the procedure should focus on identifying the early signs of RV delamination. It is achievable by checking the roof, sidewalls, windows and vents for hollow sounds, creases, ripples, bubbles, water damage, sponginess, tears and cracks.
Schedule the inspections at least once a month depending on how frequent you use the camper. Consider inspecting for delamination your RV when there are extreme weather conditions to know whether.
The reason behind this is that hot and cold weather conditions increase the risks of your RV parts getting delaminated. Plan for repairs or replacement if you notice any signs of damage.
Early repairs
It’s cost effective to repair the delaminated parts of your RV before they get worse. For instance, repairing the cracks or creases on the sidewalls (by applying new sealants) will be cheaper than replacing the entire sidewalls. Early repairs allow you to prevent delamination from causing further damage to your camper.
When conducted with the appropriate tools, they can help keep your RV in good shape and make it less susceptible to delamination.
The Process and Costs of Fixing Delaminated Parts
You’ll need a repair kit to fix the delaminated parts of your recreational vehicle. The kit usually comes with a heavy-duty, marine-grade sealant that you can use to reattach the fiberglass to the inner wood layer.
Repairs may be costly if you fail to routinely inspect and re-seal the seams of your camper. The extended warranties and insurance companies may also not cover repairs necessitated by delamination.
It will cost you $200 to $300 to purchase a delamination repair kit if you prefer fixing the problem by yourself. The kit comes equipped with a sealant, tubing and syringes for channeling the sealant into the walls. You can only use it when there’s no water damage visible on the inner wood layer.
Hiring a repair technician for the job
If you prefer having a repair technician fix the delaminated parts of your RV, it’s important to have a budget for the endeavor. Prepare the budget depending on the average fees technicians in your area of residence charge.
The costs will largely depend on the amount of damage on your camper. You’ll spend $400 to $800 hiring a professional to do the work.
Though it may seem costly, the professional service may help solve the problem in the long-term and give you peace of mind.
Most camper delamination repair technicians consider factors such as labor, profit, the type of camper under repair, miscellaneous supplies and RV parts in their pricing. Before hiring one, get a detailed breakdown of the entire service.
Will the Insurance Company Pay for the Repair Costs?
Insurance companies usually have strict policies governing RV repair costs. Most of them don’t cover delamination in the list of repairs since it’s an issue that stems from natural causes.
Insurance companies also consider delamination as a problem caused by negligence. If you want to avoid going back and forth with your insurer, consider re-sealing your camper’s sides and roof.
In Conclusion
When properly inspected and maintained, your camper will give you the luxury of traveling to different places without booking hotel rooms or renting cars.
You wouldn’t want to compromise the comfort that comes with camping by allowing challenges such as delamination to get into your way. As a RV owner, you should always be on the lookout for signs of delamination and know how to fix them before they make your camping experiences less enjoyable.