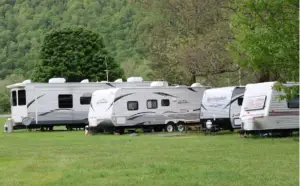
Isn’t it fantastic to be able to utilize your RV as a guesthouse when it’s parked at your house?
Sure, you could fill the tanks with an unattractive extension line from your home, but what if you could set up your own hookups right there?
Imagine a backyard with an asphalt pad and a lovely post with water and electrical hookups, as well as your own sewage hookups in the ground!
What if I told you it’s possible and not a great hassle?
Setting up your own RV hookups if you have the property and resources could provide you a lot more flexibility when it comes to overnight guests. Or even using it for yourself.
So let’s get to know everything you can about setting up RV hookups at home.
Can you install RV hookups at home?
It is possible to setup RV hookups at home and it is not very difficult to do as long as you have the necessary space and all the needed items.
Installing RV hookups at home can become complex specially if you have lesser space. But it is possible! Just make sure you do your research first to see if this is a viable choice for you.
You also need to understand on how this is going to take away your space. Its always better to compare the pros and cons and why you need to do it as its going to involve costs, take away space and will need major setup.
Why do you need to install RV hookups?
Your RV allows you to carry the warmth and familiarity of home with you wherever you go. However, your RV can be put to various other uses when you’re not on the road.
Imagine setting up your house guests in their own small domicile, equipped with a TV, infinite running water, and perfect climate control.
You may even use it as an office or a home base on a piece of property you’re turning into a second house. Hookups are a recurring motif in all of these short fantasies.
Do you need permit to install rv hookups at home?
The necessity for a permit to hook up your RV to electricity, water, and sewer is determined by where you live and the governing laws and building standards. Check with the city officials in your area to determine if any permissions are required.
With sewer hookup connections do check with the local government authorities. In most cases connecting your RV to house electrical outlet shouldn’t be a problem and same goes with water lines. Its just the sewer for which you need to be little cautious. Problems arise when you have neighbors that are affected with such setups.
What you’ll need to hook up your RV?
- RV Power Cord
- Surge Protector
- Dogbone Adapters
- Potable Water Hose
- Disinfectant Spray
- Water Pressure Regulator
- Y-Valve
- Inline Water Filter
- RV Sewer Hose
- RV Sewer Hose Attachments
- Sewer Hose Holder & Support
- Disposable or Washable Gloves
Cost
Depending on how much labor you can accomplish, electrical and water sewer hookups require investment. However, the cost may differ based on the features you wish to install.
Your willingness to invest determines the type of sewer system and electricity you require for your RV.
The RV can be the next best thing if you invest in it right. Therefore, get cracking today and turn that vehicle into the coziest place in your home.
The following are some price ranges for installing RV hookups at your house.
Water Lines – You can do this yourself for $20 to $30, but hiring a plumber will cost around $700.
Electrical hookups – This utility will set you back roughly $100 if you install it yourself. On the other hand, this utility would cost you approximately $1200 if you hired an electrician.
Sewer Connections – If you can connect your existing sewer or septic system, you won’t have to spend a lot of money. Installing a sewer tank in your property will cost between $2000 and $3000.
Before you lay the foundation for sewer, you may need to pay for permits in some cities or states.
Step-by-Step Guide
Lets now look at step by step process you need to follow for getting the hookup setup ready.
Make a parking spot
The first step is to construct an RV parking pad. If the ground becomes very wet, the goal is to have a level surface that can sustain the weight of your RV. Gravel and cement are both adequate.
Your mat should be at least 4 feet wide and long enough to fit your gear and then some.
Ensure there are no low-hanging branches or power wires over your pad, and think about how the distance from your house may influence your water and electric hookups.
Check out this my earlier post that covers details on 5 RV parking pad ideas for home.
Create a post
After you’ve installed your pad, dig a hole into fastening a post in place. It’s best if the hole is 8 inches broad and 30 inches deep.
In the spot, install a 4’x4′ post and pour concrete around it to keep it in place. This pole should be positioned on the driver’s side of the RV to hold your power and water hookups.
Installing a water line connection
You’ll need to dig a small ditch linking the faucet to the water source, where you will hook up your RV. However, you may wonder why do you need a trench at all.
You’ll need a cover in the winters that allow your waterline to run through so it doesn’t freeze and break. If you want to avoid damages to an existing water or gas line, you should check or call a utility company.
Although it will cost you more money, you will avoid causing additional damage.
- Install a CPVC pipe with a high-pressure rating. It must run seamlessly through the ditch and up to the faucet or mainline post.
- Wrap the pipe with adhesive and heat tape before securing the waterline to your RV post. It will keep your water connection from freezing above it. Use pipe clamps to connect the waterline and cement to fill in the ditch to secure the channel.
- To avoid leaks, fasten the faucet to your water line and secure the tape in place. You can now hook up your RV at home with a secure water line connection.
- Before breaking ground, contact utilities companies (gas, electric, and water) to avoid accidentally destroying anything already underground. With just a few phone calls, you can prevent potential damages that can end up making you spend more.
Putting in the electrical connection
You should first get to know your rig’s electrical service details before adding the electrical components to your post. After you’ve figured out how many amps you’ll need and what electrical equipment is necessary, you can begin with the electrical connection process to your RV.
There are two separate amperage counts for RVs: 30 amp and 50 amp. If your RV uses 50 amps, consult the user instructions handbook to know about the installation process.
- Once you’ve determined which amperes are appropriate for your RV, you should employ an electrician to complete the work.
- Allow the electrician to finish the job since, as you know, insufficient power or improper electrical installation can cause harm and danger.
- A trained electrician will know how much electrical wiring to use to connect your home to your RV.
It’s better to be safe upfront than to suffer the repercussions of carelessness afterward. You’ll be able to power your appliances in your RV after installing either 30 or 50 amps.
Finally, it’s time for sewer hookup
There are several options for hooking up your RV sewer hookup at home. You have the option of connecting your sewer to a public sewer system that already exists, or you can have your own septic tank.
- You can connect your septic system to a separate holding tank for your RV by running a pipe from your property’s septic system.
- Connect a 4-inch pipe to your RV’s in-ground septic tank before connecting it to your home’s septic system.
- Though burying a reserve holding tank for your RV is pricey, you can rest assured that you will have no problems with your neighbors or in your home.
- After you’ve finished connecting the pipe to your home’s septic system, have the holding tank drained out so that the pressure may escape.
You can pay a contractor to do it for you so that you can get your RV connected as soon as possible.
Keep this in mind before installation
Though hookup installation may seem like a fairly easy thing to do remember thing can go wrong and you definitely don’t want that to happen.
The first things is obviously you have enough vacant land in your backyard and private property.
Make sure your circuit breaker is turned off before connecting your electricity.
Always make sure your cords and plugs are in good working order. Know how many amps your RV or trailer uses, check the hookup for amps, and use an adapter if necessary. It is highly advised to use a surge protector.
Keep your fresh water and sewer hoses in different bins.
Use a hose that is clean and free of impurities to connect your clean water. You’ll be able to have running water in your sink and shower in your RV, thanks to this little attachment.
Additionally, because you never know what the water pressure will be like, it’s always a good idea to employ a flow restrictor. Last but not least, using a water filter will provide you peace of mind when it comes to water purity.
When connecting and disconnecting the sewer hose, be safe and take precautions.
When attaching and disconnecting your sewer hose, it’s a good idea to put on a pair of latex gloves. In some states, sewer rings are mandatory, so keep one on hand at all times. Make sure all of your connections are secure and free of leaks.
Maintaining the RV hookups
Once you are done installing that’s not it. At campgrounds its easy to use the hookups and you are not bothered about what happens with them.
But, here its going to be your responsibility to maintain them. A sewer hookup is the most difficult thing to do. A small error and you will end up with both costs and frustration. So, be careful and do regulars checks and maintenance.
Electrical hookup
Regular maintenance and inspection is the most effective technique to detect a minor issue before it becomes a significant problem.
Examine your batteries and all of their connections on a regular basis. If you’re using lead-acid batteries, you’ll need to keep an eye on the electrolyte levels and add water as needed.
Modern deep-cycle batteries and lithium batteries can help you avoid this need for maintenance while also extending the life of your batteries.
Also, be aware of the location of your RV’s electrical panels. If something isn’t working correctly, check to determine if a circuit has been tripped or a fuse has blown.
Usually, you can see if a fuse has blown, but this isn’t always the case. In that instance, a little test light that illuminates if a fuse is good can be used. If you replace a fuse and it immediately blows, it’s a warning that there’s a deeper issue.
You can also try following electricity cables to see if there’s a problem with the connection, though this can be difficult to do without professional assistance.
Water Line Hookup
Like any other water line, your RV could develop a leak, but there are only a few things you can do to harm the system, all of which are easy to avoid.
- Overpressurizing your water system is a bad idea.
- Debris clogs the system.
- Bacterial or fungal growth.
To protect your water lines from too much pressure, simply install a regulator between the spigot and your city water connection.
The screen in your RV’s water pump, as well as the shower and faucets, can become clogged with dirt, silt, and other debris. Using an inline water filter can help you avoid this.
Filters are integrated into several 5th wheels and travel trailers. If yours has one, make sure to replace the filter in the housing every season or when the water flow begins to dwindle.
If you don’t have a factory-installed filter, the simplest solution is to utilize a filter that attaches directly into your hose. If you’re not sure how clean the water is, you can use this type of filter to fill your tank.
Mold and germs are not only harmful to your RV, but they can also make you sick. Keeping your water tank full will help to avoid the growth of unwanted organisms.
If your RV has been sitting in storage for a long time, especially in hot weather, you should sanitize the water system before utilizing it again.
Sewer Hookup
The frequency with which your tank fills up is determined by the size of the tank and how frequently you use the toilet/shower.
If you only have two campers and a huge tank, you won’t have to dump it as often as a large family with a smaller tank.
However, as a general rule of thumb, you should not dump until your tank is at least two-thirds full. When the tank is full, gravity aids in the emptying process.
Conclusion
RVs are ideal for extra work or living space, as well as setting up camp somewhere new. To construct a living place with water, power, and sewage, you’ll need to know how to install hookups.

