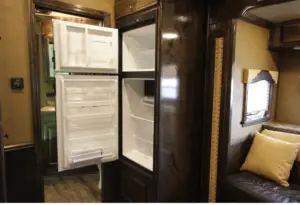
Water leaking in RV slide out is a common issue many RVers face. Such leaks can spoil your camping stay and may also lead to costly repairs. Slide outs do provide that luxury of extra space but they also come with few problems like leaks.
I have faced such leaking problems in the past and have gone through a lot like what you must be facing right now. I have tried multiple things, talked to quite a few people on this as well.
After doing further research i came up with idea of sharing all the things i found out. In this detailed report, i am listing down all things that can result in slide out leaks and how you can possible identify the real cause and fix it.
RV Slide out can leak due to worn out, cracked slide seals which need to be replaced to stop the water leaking in. Ideally, the seals should be replaced every 2 year. Slide out can also leak water when the RV isn’t leveled, this can be rectified by making sure it is properly leveled.
Regular maintenance like replacing seals on time, clearing debris, dirt, applying RV seal conditioner helps in preventing RV slide out leaks.
Why does my RV slide leaks and how to fix it
Lets see different reasons why the slide out can leak and what you can do to identify it and take action to fix the issue.
Issue with Slide out seals
The seals or the rubber gasket is what keeps the slide out sealed from weather. These prevents the water from dripping inside the camper. If your RV slide out is leaking then there is a high chance that these weather seals have developed cracked in them.
A slight cracked opening can result in water sipping in when it rains. Bad seal is by far the most common reason why water leaks inside the RV in the slide out region of your camper.
Silicon Seals may accumulate debris or dirt under it resulting in leaks. Since the exterior of the RV can go through winds, high speed it is possible that the seals accumulate such dirt underneath. This ultimately may result in developing cracks in the seals.
There are multiple ways to identify if this is the real cause.
First, the visual inspection. If the damaged part is larger then it will come to your notice easily. But, this may not be the case always. A lot of times the cracks are small and may not seem like the real cause. But, even a smaller cracked opening is enough to bring in the water.
Other ways to be certain on this point is to check under the slide for soft spongy areas. When the water leaks in drop by drop over longer period of time, the area becomes spongy soft. That’s a very good identification. Even the screws will become rusty with water passing through.
Ignoring the rubber gasket maintenance may result in such issues. Imagine how much the gaskets has to go through. The ultra violet radiations, excessive sunlight, wind and dirt. With time the weather seals will start to worn out. The cracks will develop if it is not protected and replaced on time. Using RV seal conditioner immediately after replacement and bi monthly can really keep it intact for longer duration.
With time the seals develop cracks
Even though you take good care of the seals with conditioner or other product, it will worn out after some time. And therefore, doing physical inspection from time to time is important .
Especially during the fall time do check and replace the seals if needed. Check for any signs that hint at cracks. Its better to replace it on time than waiting for the leaks to happen. As you know, a leaking water in an RV may result in water damage which can cost you heavily. Many a times people end up replacing floor due to water damage and mold.
When it leaks in a brand new RV
If your RV or travel trailer is new and you see this issues, then there is a remote possibility that the seal at some spots was not installed at all. This happened to one of my neighbors who started seeing leaking in the slide out region.
After inspecting for a while he was quickly able to identify that the certain portion of the slide was not given any gasket. He was lucky enough to get it done under the warranty.
In most cases the gasket is not covered under extended warranty.
Other issues with gasket is, it could be flapped out at certain points. Make sure you inspect it and put it back inside the rims for perfect fitting. This happens with new RVs when the gasket isn’t tightly fitted. Make sure its properly placed and fitted thoroughly.
In some cases, the new RV may have known issue with the slide out or there could be a manufacturing defect only with your RV. In either cases, do check with the authorized dealer service for the proper resolution steps. When under warranty, do not try to troubleshoot the problem yourself as it may result in warranty voiding.
When the RV is not leveled
You should be checking on this as the first step. And, it should be quickly noticeable. When the RV is not leveled it will result in water sipping in from the slide gaps.
If you see leaks happening on multiple slides on the same side then be sure to check how leveled the RV is. When it pours heavily even the slightly less leveled RV can bring in good amount of water.
Leveling a RV is a very important step and do not skip it. Make sure the RV is perfectly leveled.
Use jack for added extra support under slides. Automatic leveling may not be present in all RV’s. When this is the case make use of leveling blocks. Use bubble indicator if the RV does not have leveling indicator.
A unleveled RV not only results in water leaks but will also result in several issues like appliance malfunctioning.
Leaks at the slide out window
Bigger slide out having bedroom are more prone to leaks as it covers more area with more seals. Also, ventilations facilities like windows also have seals that can also leak.
Do check out and inspect to see if its the windows that’s the culprit. Weather Seals around windows should also be replaced within time and regular inspection should be done to identify any cracks and damage.
Other reasons why it may leak
Gutter on the RV roof may be blocked resulting in leaks in the RV through slide out gaps. Any form of debris can result in issues so be careful and always clean any dirt on the top of the roof and slide out.
The slide out top can also accumulate dirt and that’s why slide out toppers are provided. With long camping seasons the slide out top may get debris in form of leaves, mud and all other things. This can not only block the slide from retracting but may also result in leaks.
The debris can also come inside the RV after it is closed.
Blocked Weep holes can also result in water leaks through slide outs. These holes are meant for slide out locking but as per some RVers they were told by RV service professionals that these holes can result in water leaks if not properly maintained. Personally i do not have any specific point to show that it may result in such leaks nor i have experienced it.
But, its a small thing to maintain and why just take it for granted. Also, not all RV’s have such weep holes. Normally, a slide will have 2 holes separated almost at the ends.
Water lines, water pump or other plumbing in slide out
Sometimes, the plumbing lines or other water related things can be the reason for water leaks and it may not be the slide out that’s leaking. This has happened to us multiple times.
So, before you head-out and check the slide out from outside check if you have any such plumbing elements that can leak water.
Slide out leaking when open
This is a more common scenario when the opened slide is leaking. When it rains, the water flows down the slide and leaks in from places where the seals are cracked.
With opened slide the more area is exposed directly to the pouring rain which can come in from all the locations where issues exists. Unleveled camper will bring in water from gaps when its opened.
If you see that the Slide out leaks when it is closed then this could be due to seals not closing properly. There could be water puddles at the top of the slide that flows in when you close the slide. Closed slide can also bring in water from windows seals or other slide seals that are broken or get squeezed when the slide is closed. Do check if the seals are fully integrated and there is no discontinuity.
Look for these signs
To know if the slide out is leaking and where exactly its leaking you have to do inspection. The very first time we saw water in our RV, it was indeed at the slide out region. But, it turned out to be leaking water line and not really the slide out leak.
Here are some signs that the slide out is leaking and where exactly it could be leaking.
First important thing to note is, it may not be the same spot where it leaks where you see the water. If its leaking at the floor or at the bottom corner of the slide out then the issue could be anywhere at the top of the slide.
The water would always flow from top to down if you think logically. So, identifying the exact location can be little tricky and will need more inspection.
A window weather seal could be the problem. A roof of the slide or the side seals can be the issues. Here are some signs to look for.
- Underneath of the slide seems to be spongy at certain locations.
- The seal has cracks and looks worn out.
- Moisture inside the camper, in the slide out location. Mold or mildews appears inside the slide out room.
- Condensation inside the slide out area. Such condensation can be due to other reasons as well though. But, its always better to get it fixed as it can ultimately lead to bad mold, smells.
- Screws on the strips holding seal getting rusty due to moisture or water flowing through. Screws may also get loosened.
- Splits in silicon on the seals.
- Color changing of the seal hints towards replacement long due. The seals may become softer and powdered which you can feel by touching and squeezing a little bit.
Replacing the seals on slide out
To avoid water leaks it is recommended that the slide out seals are replaced every 2 years and should be inspected 2 times a year preferably during spring and fall. Using RV seal conditioner can help in protecting it from early damage.
The very first time i tried replacing the rubbers seal, i was hesitant as didn’t knew much on whether unscrewing the strips would cause any damage to the slide. I did fair job and from there on i have been pretty good with it. Here are all the steps that you should follow while changing the seals.
1. First step is to make sure you determine which side of the seal you want to replace. Locate all the screws that need to be removed. Keep all the tools handy like screw driver, scrapper, seal conditioner, scissors or cutter and the new set of seals
2. Next, unscrew the strip and keep the screws in a box so that you don’t loose them.
3. Remove the strip and slowly start removing the seals. Try not to break it, this will help later on to identify the exact length needed to replace. I always follow this. It really helps to cut the new rubber gasket with exact length.
4. Once you have removed the weather seal, clean the remaining rubber from the slide using scrapper. You can do it with hands as well, but for better cleaning using scrapper is great. The rubber remains can become hard with time, so you may not be able to clean it fully with hands.
5. Once you are done cleaning it, cut the new seal to match the exact length. Later, place the seal at on slide and using scrapper fit it in the gaps as perfectly as possible. This is an important step as if it doesn’t fit in properly then you may end up having leaks again.
6. Screw back the strip over the seals and make sure all screws are tightly screwed back. Congratulations! you are done with replacing the rubber gasket. Apart from replacing the seals make sure you clean top of the slide out. Debris at the top can result in many issue so be sure you take proper care from time to time.
Before you jump on replacing the seals make sure you know some basic things about the slide out system employed in your RV. Not all slide out’s are the same. There are 3 basic mechanisms used in slide out construction. Before you start with this DIY repair project its critical you have basic knowledge, just to be sure that you wont aggravate the problems.
Preventing the leaks
Rather than having to fix it, i would always take actions to prevent the leaks. Any type of water leaks in RV can result in water damage which can be a costly affair. Having to replace the the floor is very costly and you may have to spend more than $1500 on average to get this done.
So? Better to always prevent the leaks from slide out which by the way, are the most common area of leaks.
After thinking a lot, jotting down all the things that i missed in the past and have been following, i am listing down all the actions one has to take to stop the RV slide out leaks.
Make sure you visually and physically inspect all the seals from time to time
Ideally, you should do thorough checks 2 times a year, in fall and spring. But, its always better to do some sort of checking every time you head out for the camping trip specially, if its going to be a long trip.
If you are full timing and staying at a location for longer duration, then too, make sure you do this multiple times inside the 2 times a year as well. Do not wait until it develops cracks and you have water under your bed, suddenly.
Problem with leaks is that you may not identify it until its late. Unless you are vigilant, this can go unnoticed.
Use RV slide seal conditioner
This helps in keeping the seals protected from UV rays, damaging sunlight, wind, and dirt. Such sprays can be really helpful and you should use it once in a while as part of your slide out maintenance.
Replace the seals every 2 year or as soon as it shows signs of cracking
If you bought the travel trailer used then check with the owner on when it was replaced last time. Based on the condition of the seals replace it you don’t get a clear answer.
Employ a slide out topper
This can really help in maintaining the slide out. Top of the slide out can accumulate dirt, leaves and all kinds of debris and a slide out toper will help in keeping all this out. Weep holes can get blocked due to dirt, gutter on the roof can also get blocked with debris. Be sure to climb up using a ladder and clean the roof portion of the RV as much as possible.
Make user of RV slide out rain guard
Heavy rain pouring in can make even a perfectly fine slide start leaking in water. This can happen when a lot of rain water starts to drip down the slides. If you find yourself camping in such situation then make sure you make use of rain guard that will keep the water away from slide components. Check below video on how this can be done.
Keep the RV leveled
This should always be your priority while doing the setup at the camping site. Make sure you keep the RV as leveled as possible. If it is raining heavily, the slide out will leak when it isn’t leveled. You may not notice the leaks until its too late so be sure to not take this lightly.
Leaking slide out while camping
Having a leaky slide out should not stop you completely from camping. If you diagnose that the slide is leaking make sure the first step you take is dry the area where you see the water inside the RV. Use paper towels and remove the water completely. Utilize fan to make it as dry as possible. Such water can result in major water damage if left unattended.
If you feel the water is too much close the slide out to see if that stops the leak. You can identify the leak if possible see if you can employ some method to divert that water. Else, once you are back home take necessary action. If you cannot do it yourself then take the RV to the professional repairer and get it fixed before your next camping adventure.
Conclusion
Water leaks in RV slide out can be easy to identify and fix. Its always better to prevent the leaks though. Taking few steps can help you keep the water out from the slides. Hopefully the actions and pointers i discussed in this article have solved your problems and educated you to prevent slide out from leaking.