You will agree preparing your RV or travel trailer for winter is lot of work. But, its important as otherwise you will have hard time taking it out on road the next season.
Should you remove the RV battery and store outside in winter is one of those questions that baffles many of us. In this article, lets find out the answer and the whole process you should follow.
It is recommended to store the RV battery separately during winter rather than keeping it plugged inside the RV. Clean and fully charge the batteries before storing them on a clean dry surface. Don’t allow the battery to discharge below 80% and check its charge once a month.
Battery Failure
By far the most common reason why RV batteries die is either undercharging and overcharging. I cant tell you how many RVers face this issue.
Read : How long does a RV Battery lasts
Overcharging can result in corrosion of the batteries and also water loss. If the batteries are overcharged and neglected t will result in destroying them very fast.
Undercharging occurs when the batteries are discharged more often resulting not fully charging.
When the batteries remain discharged for long time the sulfate material in the batteries start form crystals this process is called sulfation. Lead acid Sulfation of batteries then results in ruining your RV batteries.
Both these reasons are directly related to our main question. Whether the batteries be stored separately or kept inside the RV which is plugged in.
There are number of precautions to take that can help you avoiding premature battery replacement. RV battery maintenance is key in keeping it going for long. Lets deep dive and understand the scenarios.
Before Putting Batteries In Storage
Before you go ahead and put the batteries into storage make sure on below points.
Check the batteries for any damage. Check for any irregularities like a fluid coming out from the batteries. These are good signs the battery has a damage.
Removing the battery :
The correct way to remove the batteries from RV is to first disconnect the negative terminal. This is important.
Let me tell you the reason. When you first remove the negative you are avoiding the short that may be caused due to any capacitance charge devices on positive circuit touching the ground.
So, follow this always.
When you are putting the batteries back you do the exact opposite.
If the battery terminal don’t have positive/negative on them make sure you mark them before putting the batteries in storage. This will help you when putting the batteries back. A small thing like this can help you in avoiding shorts and other issues.
Once you have disconnected the battery turn off the ignition switches in RV. Do same with all electrical switches as well.
Read : Tips for Using Travel Trailer In Winter
Cleaning the batteries :
Next step is to clean the batteries if needed. Make use of baking soda and water mixture to remove any corrosion that may have resulted due to prolong use.
Corrosion results in discharging of the batteries when in storage, so better to clean them properly. If you are not sure on handling the batteries be sure to take help from authorized service center. Not all of us are used to this stuff, can understand!
Clean the terminal as well if you see them untidy. Make use wire brush for this. This will help in removing the remaining corrosion as well. Since you will be putting your RV or travel trailer in storage for good 3-4 months, its a better idea to follow all this procedures. And you don’t want the battery to discharged again and again while in storage.
Remember, you have to keep it charged to max and not allow it to come below 80-85%. So, this brings us to the next step. Charging the batteries before putting into storage.
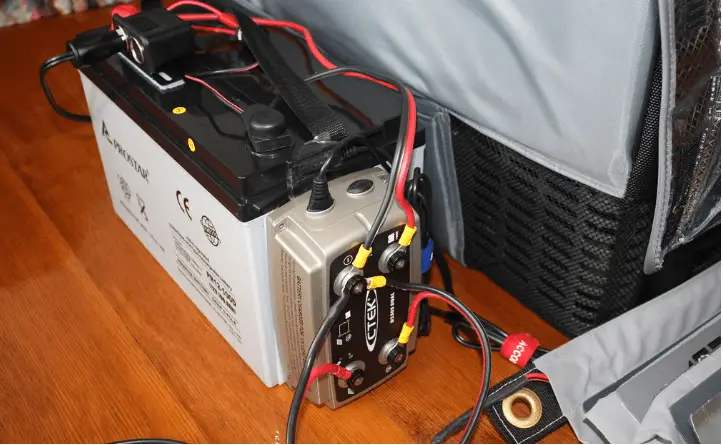
Charging the Batteries
Once you have removed the batteries and cleaned be sure to check what is the charge on it. Test the batteries using a multi-meter or hydrometer. If the batteries are less than 80% go ahead and charge them. In fact make sure the batteries are fully charges before putting into storage.
At any point it goes below this you need to charge them back. Will come back to this later below. First makes sure you have them charged up fully.
By the way did you know that a 12 V battery when fully charged shows 12.73 V? That’s funny isn’t it?
But, yes its 12.73V when its fully charged. And at 80% it would be 12.5. So, your job is to keep it above 12.5 while in storage.
For a 6V batteries its 6.37 V and at 80% its around 6.25V
When the Battery Goes Bad : While testing If the battery shows 0V that means the battery has gone bad, either due to short circuit of neglected maintenance.
Normally RV battery do last 3-6 years but that depends a lot on how you have charging and keeping them in good condition. Having a bad battery in RV is such a pain when getting back your rig back on road the next season.
When you fully charge the battery and still the voltmeter reads less than 12.7V then that means your battery is undercharging due to sulfation.
Keep these numbers handy when testing the batteries so that you don’t forget. It can be confusing. Do check electrolyte levels in the battery before and after charging.
Make sure the area around battery while charging is properly ventilated. Always charge batteries the right way else you may see a day when the battery wont charge.
Read : Troubleshooting the RV Battery that does not charge
Below is the voltage table for you for both 12V and 6V batteries.
| Percentage | 6V | 12V |
| 100% | 6.37V | 12.73V |
| 90% | 6.31V | 12.62V |
| 80% | 6.25V | 12.50V |
| 70% | 6.19V | 12.37V |
| 60% | 6.12V | 12.24V |
| 50% | 6.05V | 12.10V |
| 40% | 5.98V | 11.96V |
Storing the Battery
You RV Battery is going to stored separately so figure a dry and clean location for this. Figure out a warmer space inside your garage or home to place the batteries securely. If you live in a very cold region then you need to be more careful about this.
Make sure you don’t keep the batteries directly on the concrete floor. It better to keep them on a base made up on cardboard or any other material
You may have heard about batteries getting freeze. It may happen when the temperature goes much below. Here again the how much the batteries is charged has an impact.
A discharged battery has higher chances of freezing then the fully charged one.
A fully charged battery can freeze if the temperature goes below -55 degree or so where as a discharged battery can freeze at -20 degrees. While batteries are in storage there can be discharge and its good thing to check on the batteries while in storage.
While you may hardly need to charge you batteries its better to check on them. Ideally you should check the batteries on monthly basis.
Normally batteries when idle can loose around less than 5% per month and the storage period is longer then charging may be needed.
The automatic discharging is higher in case of high temperatures as compared to low temperatures.
Installing them back
Charging batteries while in storage may not be needed but keep an eye on the voltage levels as per the above table. Once you are ready to start the RVing again its time to check the voltage levels.
After 2-3 months it will definitely be lower than 100%. Thus, get it charged and make sure its charged fully.
Remember the terminals to follow? Yes, you need to connect positive one first and then the negative. You should have the marking on the battery terminal. Usually red is the positive and black is the negative.
Read : De-winterizing your travel trailer
Here are your steps in installing the batteries back into your RV.
First make sure all the appliances including lights are off to avoid power draw. When connecting if the negative terminal shows spark, that means the draw is still happening. SO, be careful with this.
Before you put in the battery and connect make sure the batteries are clean. Sure, the battery was in storage but with time it can result in corrosion. So, clean it using same method we discussed before putting it in storage. Terminals too need to be cleaned using wire brush. The metal should shine to some extent after you are done wit cleaning. Juts think of this process as if you are putting in a new battery.
Again check on the electrolyte level and fill in if its not upto the level. Top up the electrolyte by filling in distilled water.
Place the batteries in tray for connecting the right terminals. Connect the cables with the battery and then test if the lights are turning on.
You are good to go.
Storing Batteries Inside RV
If you keep the batteries inside the RV itself then you need to be careful on few things.
Many of us believe that keeping the batteries is in rv will keep them charged and fine but that may not be true.
While its fine to keep your RV of travel trailer plugged in all the time, it may damage the batteries inside them.
If you are just starting with placing your batteries in garage or RV then go ahead follow all the steps. If you are not sure or don’t want to deal with all this do take hep from professional. The guidelines here are in general and you should always check with the professional technician if you have doubts. Not all RV’s same and so are Camper batteries. Therefore chances can be that some of the things here-in may not apply to you.
When the RV is plugged in Storage
With RV plugged in, the batteries will receive the constant charge and this can lead to electrolyte going dry. Therefore you need to keep an eye on the batteries. If the electrolyte goes low then you need to top it off with distilled water.
This is critical as otherowse the batteries wil get damaged. You definately dont want to buy new pair of batteries for next season.
What happens when the batteries are left inside RV without the RV being plugged in. IN such a situation there can be higher discharge due to parasitic load. Once the batteries start loosing charge it result in lead sulfation. The lead acid sulfation crystals block the battery plates and ultimately battery will start to loose it highest charging state.
There it can be good idea to keep the battery stored separately and avoid battery damage due to overcharging and discharging.
Battery Charging Options
There’s a lot of misunderstanding around this. So, how do you charge the RV batteries. The RV batteries are charged using the AC from the RV. You will need a converter for this which will convert the AC to DC and charge the batteries.
You can also be Using an alternator of the RV to do this. And also an generator from your RV or solar panel kit system as well.
Lets talk about when the batteries are hooked inside the RV. During this scenarios if the RV is plugged in it will start charging the batteries via the converter kit placed in between the battery and the RV AC system grid.
RVs can be 50 amps or 30 amps. Most small campers usually are 30 amps.
When you are not hooked to shore power and using the generator, it will be running the RV appliances as well charging the batteries. Same is the case with solar panels as well. You also get battery boxes with solar kits that charge the batteries.
The next option is the use of tow vehicles or motorhomes alternator to charge the batteries. It works on simple principle of converting mechanical energy into electrical energy which is then used to charge the RV battery. This is also the method most vehicles use to charge the batteries. Alternator is a best option when going on long RV trips.
In Conclusion
I hope a lot of battery storage questions are clear now. Next time when you start winterizing your camper trailer, you will have this checklist related to battery with you. A precaution on how to store the battery properly will enhance the battery life much more.