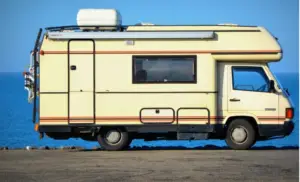
Setting up your RV or travel trailer at a campground is not tough. Many people make simple mistakes that can actually result in additional costs like repairs or replacement.
In this article, lets go through common mistakes people make while doing the RV setup at campground.
1. Not Choosing A Right Camping Spot
This is easily the first mistake that many people make. The start itself can go wrong and after that, don’t expect things to fall in place.
Although in most campgrounds you will be just fine choosing any spot, make no mistake without having a good hard look before you make the setup.
There are several things that will make that camping space the wrong one for you. You will learn this with experience.
You have many things like sewer hookup, water connection and electricity connection to have a look at. All these hookups need to be in proximity of your RV.
The hose’s that you have may fall short if the location is such that the connection is far or on the other side of the RV.
Apart from the hook up connections, there are other things that you need to check. Make sure there isn’t tree whose branch will come on top of the RV. With high winds or storm you never know, a falling branch on your RV will make a big damage.
Parking in shade can help in summer but you need to think about the risks it can pose.
Surface or Ground: The spot need to be fairly leveled so that you will have to make minimum efforts getting the RV leveled. Check how hard the surface is, avoid soft or surface with lot of grass. It can affect if you are planning to spend lot of days or weeks at the location.
Tress beside can also block your space, awning. Slide out extending can become a hassle if there are other things that block.
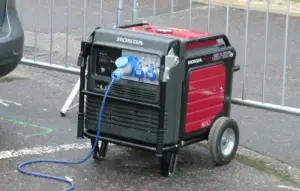
If you are camping with no shore power then make sure you have enough open space around where you can place the generator.
RV generators can make a lot of noise and if you keep it running at night, your sleep will definitely be spoiled. Neighbors may complain that’s another headache too.
We prefer keeping the generator at-least 5 feet away preferable on the other side of the sleeping space. Get a cord or cable long enough and make sure you place the generator far enough.
Obviously, if you are at campground then you don’t even have to bother to turn on the generator.
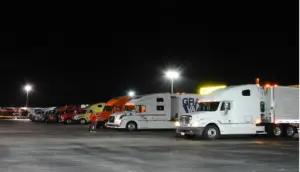
Another thing when you are camping is to make sure you aren’t camping very close to other people. Even at campground, get a spot that isn’t crowded already.
2. Not Leveling The RV Properly
No matter how leveled spot you get, its always better to level the RV. A shaking RV will not allow you to sleep at night.
Read : Why Should the RV be leveled?
You surely don’t want your kids to roll down the bed. Also, not keeping the RV leveled means putting the appliances like refrigerator or air conditioner at the risk of damage.
Modern and high end RVs have automatic hydraulic leveling but travel trailer or other RV’s need to be leveled using blocks or pads.
Get bright color blocks and place them on the ground and get the RV tires climb on it.
Having a family member or friend during this times to guide is important. You may have hard time doing it alone. Some RVs also have stabilizers that can be used additionally to keep the RV from rocking and shaking.
This setup can look like a lot of work initially but with time it can be done quickly as you learn and understand the RV.
Leveling the RV or travel trailer is crucial part of your setup at campground and therefore do take it with due importance. You may not necessarily need to do this for all tires.
All you need to do is check with the device that shows how leveled the RV is without any leveling implementation. And after that, you need to decide on which side the blocks are needed.
The leveling blocks comes as pieces that can be stacked together depending on the width that you need.
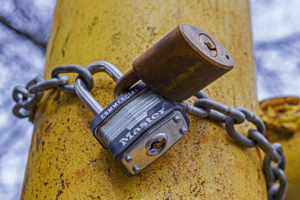
3. Using Electricity Without Surge Protector
This is a big mistake if you own a high end RV. Even with average RV, you need to protect the appliances. A surge protector will prevent your RV from electrical damages that can result due to spike in voltage.
Even though we have never seen such a thing happening, we always make sure the surge protector comes in picture between the RV and the shore power connection.
Its a simple and less costly device but it will protect your hundreds and thousands of dollars. So, i would suggest to simply go for a surge protector and save your RV from electrical shorts.
Its not that all campground are prone to such spikes but even thunderstorms can cause the voltage spikes. There can be several things that can result in such fluctuations and your don’t want to risk it.
Check If Power Is Usable
So, when you start to make the setup make sure your surge protectors indicates that the power at campground is usable.
A good power will show green lights on the device. There will be multiple lights indicating it. Different makers have different way of indicating it but most of the common surge protectors indicate with multiple green lights.Its fairly easy to understand it through the labels written on it.
It doesn’t take high spikes or high fluctuation to damage the sensitive electronics appliances. Your laptop or TV can get damaged even with small fluctuation. This device coming in between will get destroyed itself and protect your costly appliances.
4. Using stabilizing Legs For Load Bearing
These are to be used to keep the trailer from shaking and keep it leveled. You should not put weight on them by pressing too low. This is a common mistake many new RVers make which results in bending the stabilizing legs.
You just need to bring them down till they touch the leveling pads. Once they touch the blocks, little bit more press till it clicks. Not beyond that. Do not press them down further as that will put pressure on them and destroy and bend them.
They aren’t meant for supporting the rig’s weight. In case of more high end RV’s, you will get hydraulic stabilizers that will be automatic.
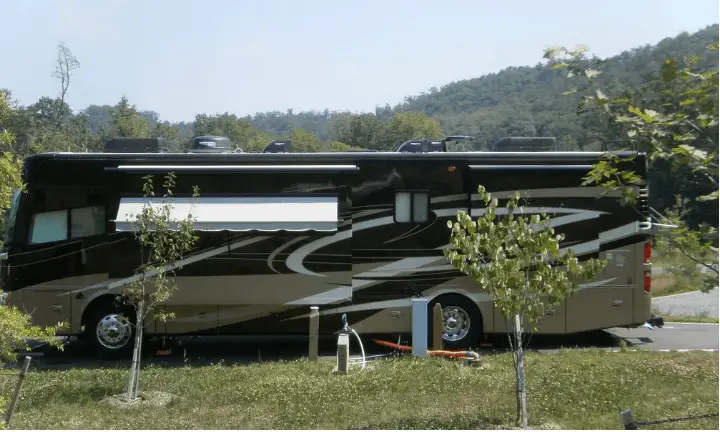
5. Positioning The RV With Hookup Far Away
We did see the first point as choosing the wrong camping spot. This point is specific to positioning the RV wrong way even at the right spot. Before you park the RV make sure you are aware of the positioning of the all the 3 hookup connections.
Why i make this point specifically is because once you park the RV and start the setup you don’t want to have a situation wherein you aren’t able to reach the sewer hose or water connection.
At campground, maneuvering the RV can be hard thing with RVs parked all around. This can be further difficult when you own a big 35 feet long travel trailer. All i am saying is, know about main hookup points and where your RV connection is and then place the RV accordingly.
Sewer hose that take the black tank or grey tank output may not be very long so adjust the RV accordingly. A lot of people seem frustrated during their initially days of camping due to this.
A Lot Of Work : Initially, even we have felt like the setup is so tiring and a lot of work. But, with many days and months of camping this becomes your routine and you know exactly how to go about it. So, be patient and learn your routine. You will be much quicker once you understand your RV.
Having knowledge about your RV dimension is also crucial. You should exactly know how long and wide your RV is.
6. Not Using Pressure Regulator For Water Connection
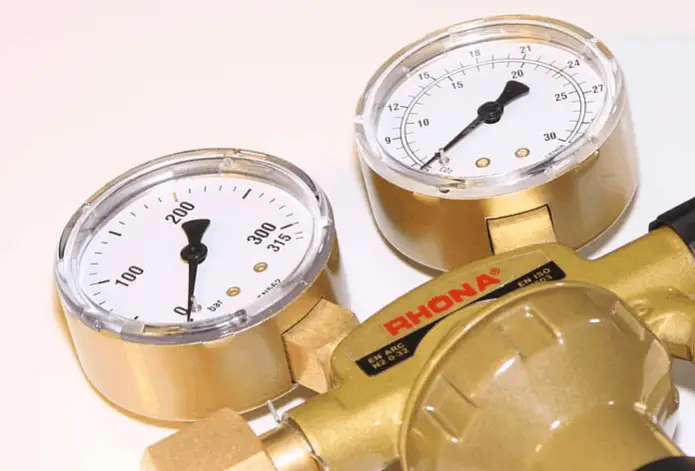
campground can have very high water pressure that may not be suitable for your RV, resulting in damaged pipes in the RV water system.
Your RV may not survive greater than 50-55 psi. Various RVs are designed for different psi’s but mostly 50-55 is the standard. Some campground may have higher water pressure and you don’t want that to hurt your RV water system.
Your RV hose may burst and also internal piping may get damaged when the higher than expected pressure flows through them.
Campground have to serve different types of RVs and generally pressure can be higher. If you own a lower end RV then be sure to have a good regulator that comes in between the campground connection and your RV.
Water regulators come with settings which you can set depending on your RVs limitations. This mistake can cost you hundreds on dollar in getting the plumbing system repaired.
Even small cracks or damage can turn out to be big problem with RV. Leaking water inside the RV is the source of many issues like mold. So, be sure to have this small and inexpensive device come in between as the protector of your piping system.
7. Avoiding Water Filter Between Water Connection And RV Inlet
Campground do not necessarily have good water and you will need a water filter for water connection. We place a small water filter that comes in between the water connection and the RV. The water is filtered before it enters our rig.
Even though we do not use the water for drinking we prefer to have this filter as we do not want any bad water to enter the RV. The water goes to your kitchen faucet for dishes or shower so its kind-of have contact with you and its kind of safe to filter it.
Also, the filter wont cost you much. Its just a better idea if you want to keep all things healthy and fine. Many people have filter that’s used for drinking purpose only. That’s great, but having a device that filters the water for other purposes is additional safety. Its upto you, in-fact many people follow this.
8. Having Short And Inflexible Hose
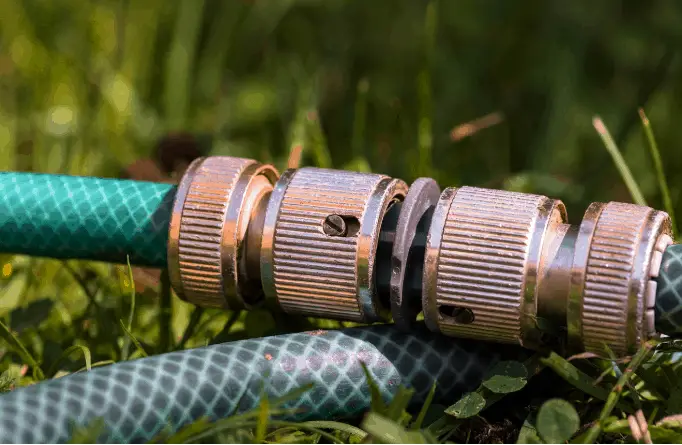
The water connection at the camping spot can be any where around the RV. So, its imperative that you have a long enough hose for fresh water.
Also, having s hose that’s hard can be a problem. It may break due to twists and turns. Have a quality hose that is flexible enough and also wont block the water when bend. Same goes with other hoses for for grey and black tank output.
We prefer to have multiple hose with different diameters and connecting setup. Not all campground are standard and you need to have hose and other setup that you can quickly connect and do the setup.
9. Not Having Long Enough Sewer Hose
Similar to fresh water hose you will need log enough sewer hose. Usually this will be smaller than a fresh water hose.
With fresh water you will have multiple inlets. But, for sewer you will need one hose. Usually these come in short length and you will have to connect multiple to get the final length.
Placing the RV keeping the sewer connection in mind is therefore important. You don’t want to have the output from RV and campground connection be far.
Hose Support : Other thing with sewer hose is to have sewer hose support. This helps in keeping the hose lifted on one end giving slope like elevation.
This is important as otherwise things may not flow smoothly. Some states also have this as rule to have support. So, depending on the sate do have this in your RV support equipment.
We always carry the support as it makes the whole thing easy. You don’t have to deal with stuck grey or black tanks output when you have the support.
10. No Routine Or Checklist To Follow
Doing the RV set up at campground, specially when you are new can be tough. It may take an hour or even more when you are new.
And, even then things may not be exactly as you would like.
You may not have a perfectly leveled RV. Your sewer connection may spill. The fresh water connection may start leaking. There can be several things that may go wrong.
The setup is one thing and packing up while leaving is another thing. Many people mess it up when they are about to go back from the campground. That’s when a checklist or routine can come handy.
Having a printed checklist. Specially for new RVers this is a must.
We follow the checklist even after RVing for many years. Doing things as per checklist kind of helps you in not having any doubt while leaving back.
There are so many things that can go wrong. A open slide out or a open door or an door step that remained extended. You may forget some things at the spot.
Having a routine is therefore much necessary. There will be little-little things that you may end up skipping. Having a checklist will keep track of all those things.
The RV setup can be tiring and you may initially feel that, its all hard work rather than enjoying. We have felt the same during our initial days.
But, believe me that’s how it is for many in the beginning. With days and months of camping you will find your routine and it will all be easy.
Once you have this routine you will hardly need 10-15 minutes to get all the things setup and you are ready to go. So, do not get stressed up if its taking more time to get the setup done. With experience you will be much faster with it.
11. Not Using Glove While Dealing With Sewer Hose System

Sewer hose Spill over can happen anytime and its better to have a glove on. Just get a pair of glove and put it on when you are doing all the sewer hose connection.
Specially, when you are packing up its more important to have them on. I put it on all the time when i am dealing with sewer hose system. Its a good practice
Once you are done with it, make sure you wash the hands with glove on, just to be double sure. Next is to clean the hands with soap and then use sanitizer to clean the hands. Its a good practice to keep hygiene and i prefer doing it.
Dealing with sewer hose specially with black tank can be hard. But, its all easy if you have proper setup tools in place. Following all the other tips herein will help you avoid these mistakes.
12. Not Turning Refrigerator ON Before You Start The Travel
Refrigerator takes long time to cool. It May take 6-8 hours to cool and you have to plan accordingly else you will be at the site only to find the refrigerator isn’t cooling.
If you cannot keep the refrigerator ON while driving then there are other ways how you can keep it cool. Keeping the refrigerator ON for whole night before can be tried. Using ice packs inside the refrigerator can also help keeping it cool.
Packing the refrigerator well can also help increasing the efficiency of cooling. Frozen foods inside it will also cool it down.
So, if you cannot keep it turned ON while moving then try these things. When the refrigerator is propane run, you have to avoid running it while driving. A fridge fan can also be used to keep the interior of the fridge cooler.
Here are all the tips to keep the refrigerator cool while driving down the road, do check it out.
In Conclusion
Many of these mistakes can be avoided easily. Also, getting some of these devices will not cost much as well. A filter or surge protector will cost you less than a hundred dollar. A printed checklist is a great way to keep things intact and in control.